Tutorial
Posted on 週日 19 七月 2026 in Blog
Quick Navigation
1. Installation
Windows
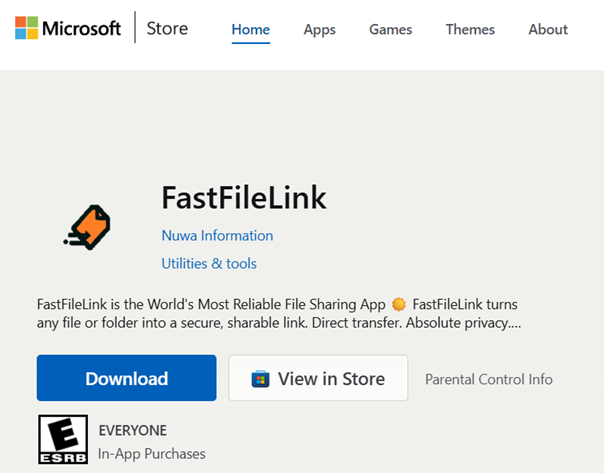
You can download the free version or the Standard/Plus version from our official FastFileLink website. In addition, you can also download the free version from the Microsoft Store.
For your convenience, we recommend downloading the software from the store. However, if you need a portable version—for example, if you want to run it from a USB drive—you can also download the portable executable version.
Mac
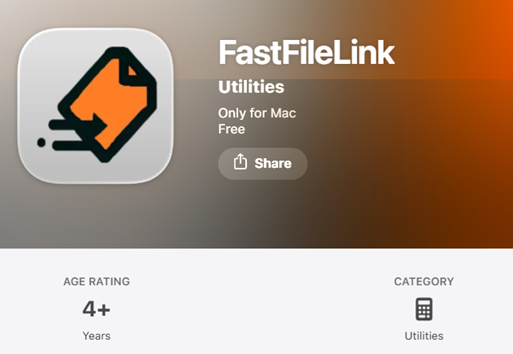
You can download the free version and the Standard/Plus versions from our official FastFileLink website. In addition, you can also download the free version from the App Store. Please note that the current App Store version does not support upgrading to the Standard or Plus plans via account activation. To use the Standard or Plus version, please download it directly from our official website.
For your convenience, we recommend downloading the software from the store. However, if you need a portable version—for example, if you want to run it from a USB drive—you can also download the portable executable version.
Linux
You can download the free version or purchase and download the paid version from our official FastFileLink website.
Supported Distributions
FastFileLink currently supports the following Linux distributions:
- AlmaLinux 8 / 9
- Rocky Linux 8 / 9
- Ubuntu 22.04
- Debian 12
System Requirements
FastFileLink for Linux is built for x86_64 systems and requires the following libraries:
- GTK 3
- WebKitGTK 4.0
Please install the required dependencies for your distribution before running FastFileLink.
AlmaLinux / Rocky Linux 8 / 9
Ubuntu 22.04
Debian 12
Future Distribution Support
We are currently working on packaging FastFileLink as an AppImage. Future releases will support additional Linux distributions without requiring distribution-specific installation steps.
2. Account Activation
We provide two operating modes. Only Server Mode requires account activation. For users who have purchased an account, the Windows and Linux versions downloaded directly from our official website already have a license key bound and can be used without manual activation. However, other versions obtained from sources other than our official website, as well as all other platform versions, must activate the account in order to use Server Mode. Below is the activation process, demonstrated using the Windows interface.
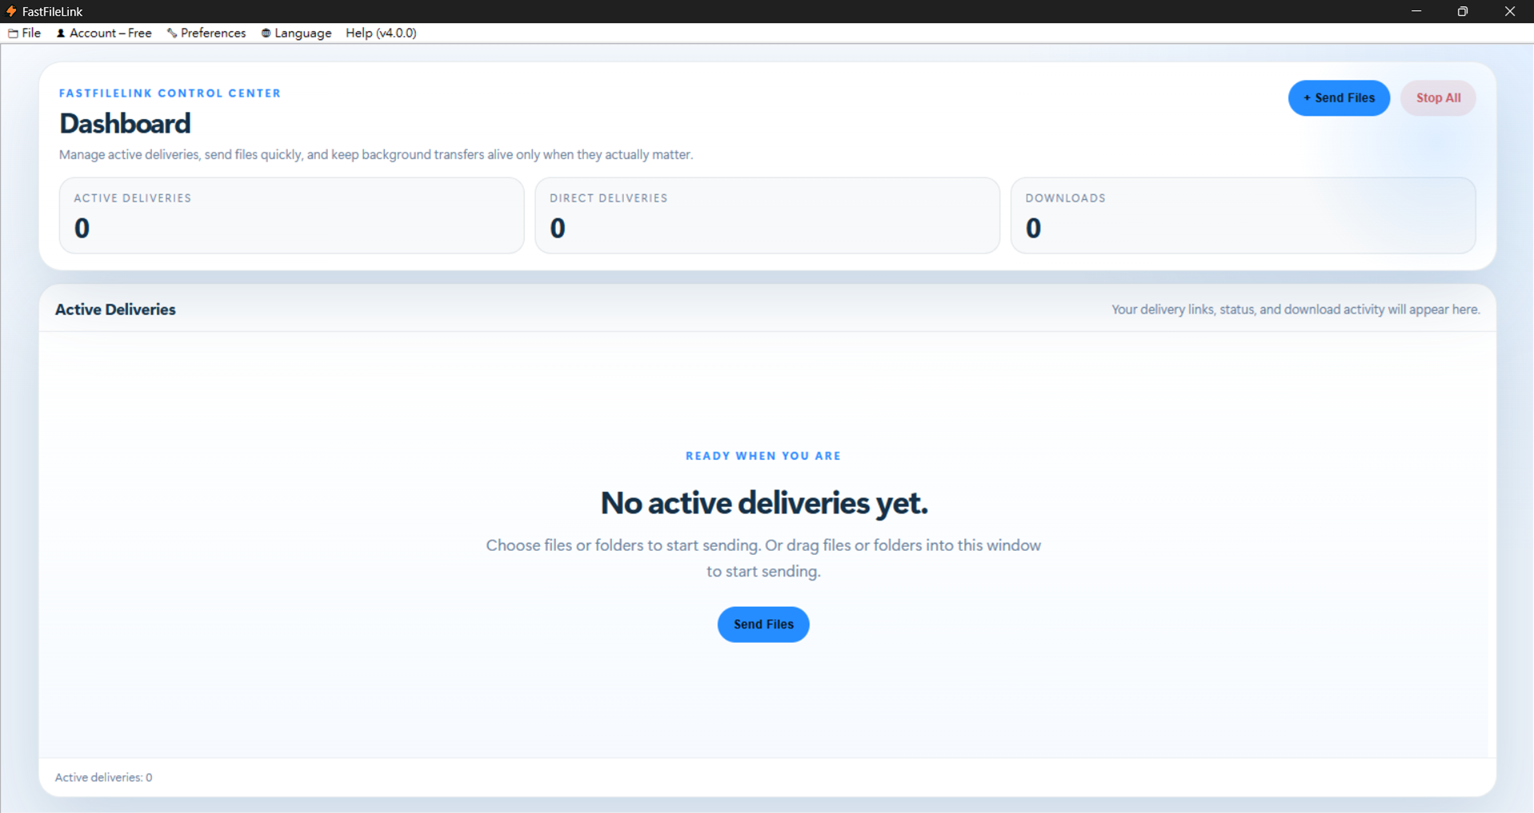
Step 1. Open FastFileLink and you will see a menu bar on the top left side.
Step 2. Click on the "Account – Free" and you will see "Activate This Device".
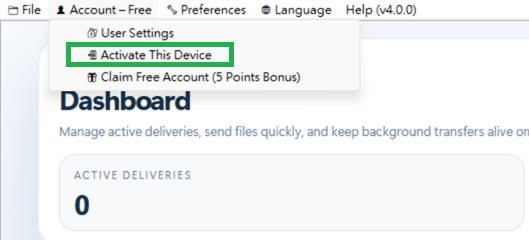
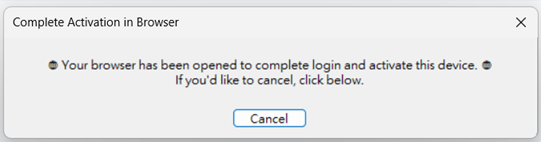
Step 3. Click "Activate This Device" and a window will pop up informing you that we are going to complete the activation process in your browser, and the browser will also open automatically.
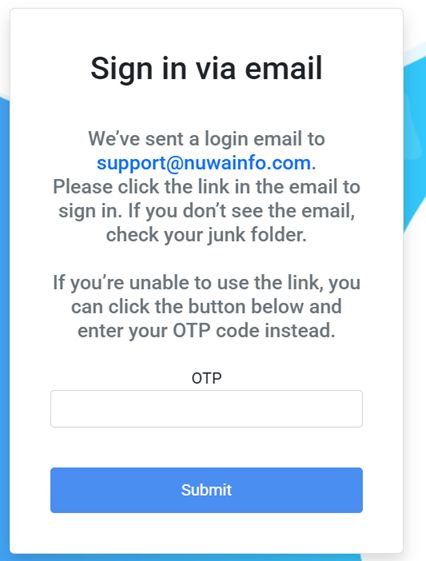
Step 4. Follow the instructions shown in your browser to finish the activation process.

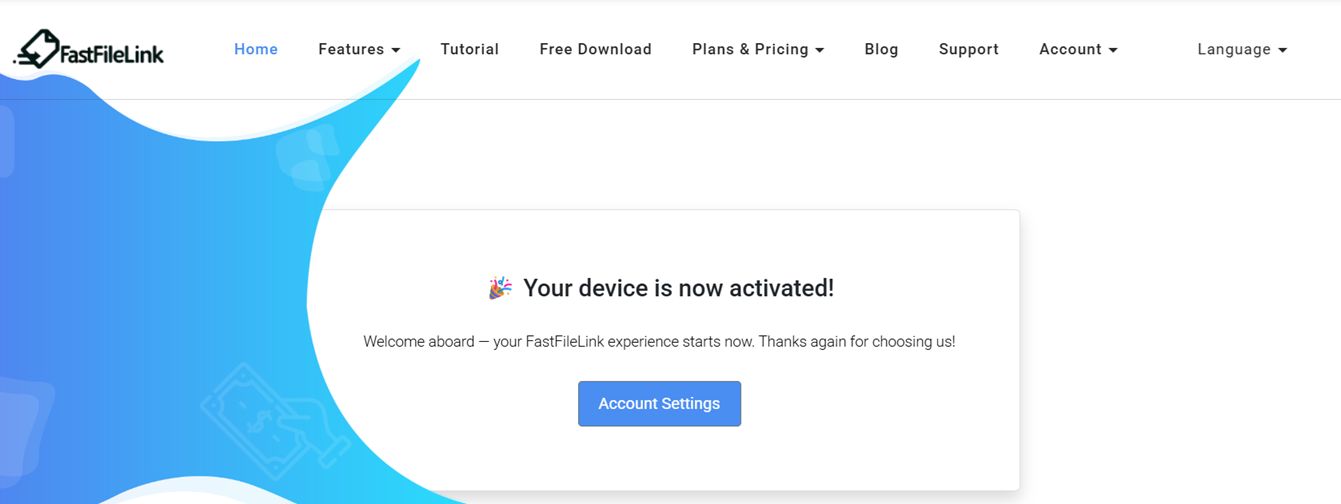
If successful, you will see the “Your device is now activated” page. You can then continue using the app with your account.
3. Step-by-Step Guide
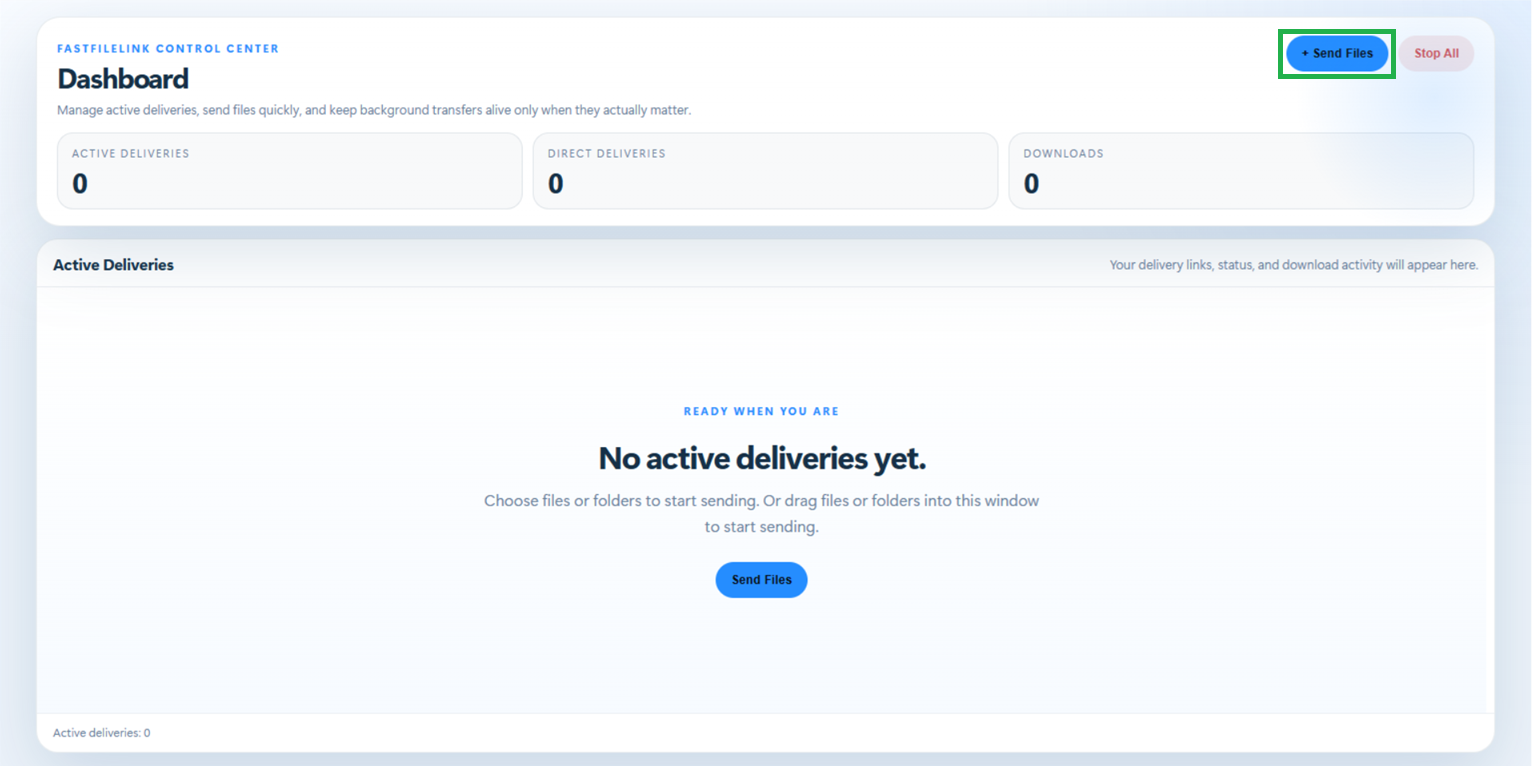
Click “+ Send Files” to open the sharing page. Here, you can choose whether you want to upload files or folders.
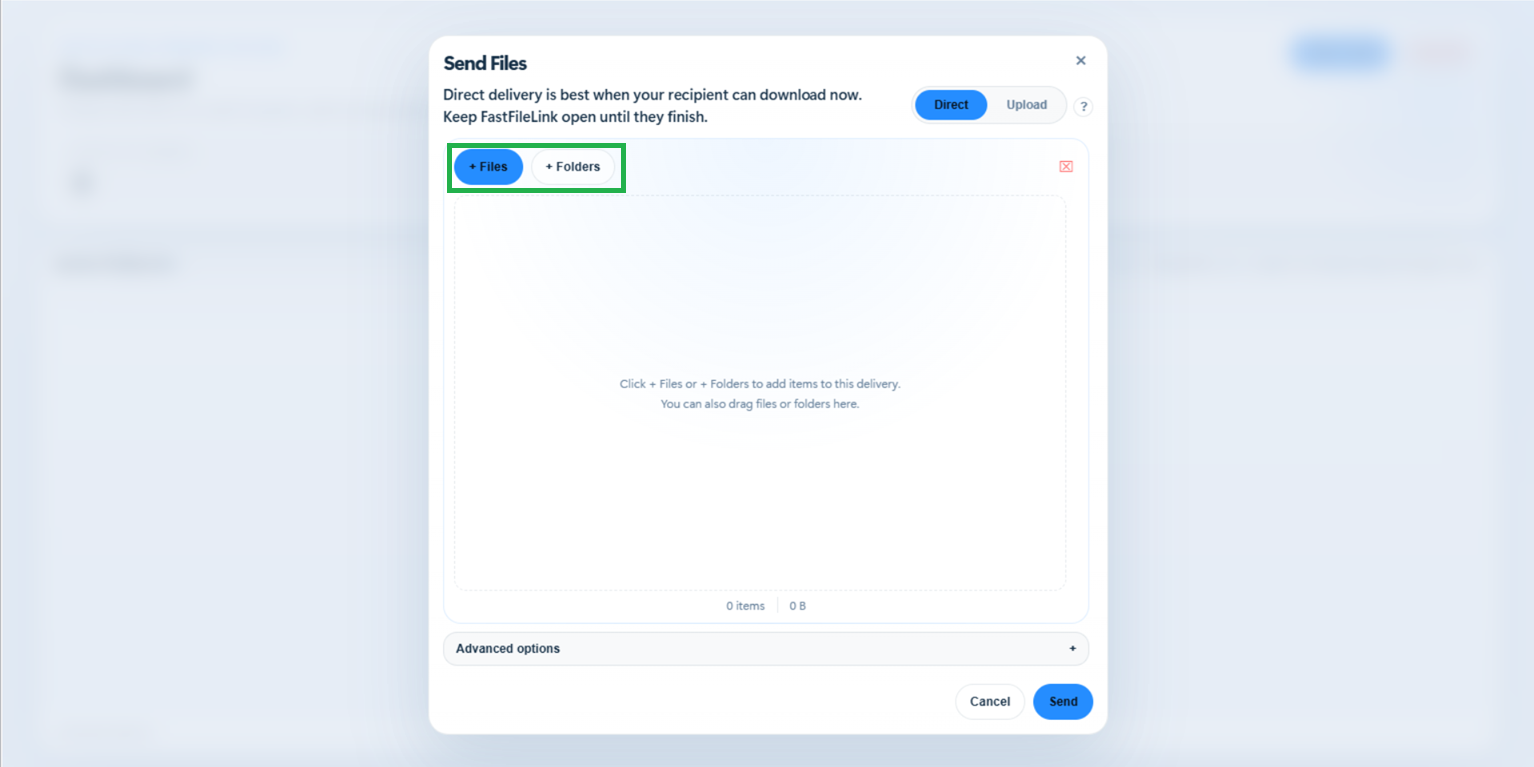
After selecting the files or folders you want to upload, you can choose the share mode: Direct Mode or Upload Mode.
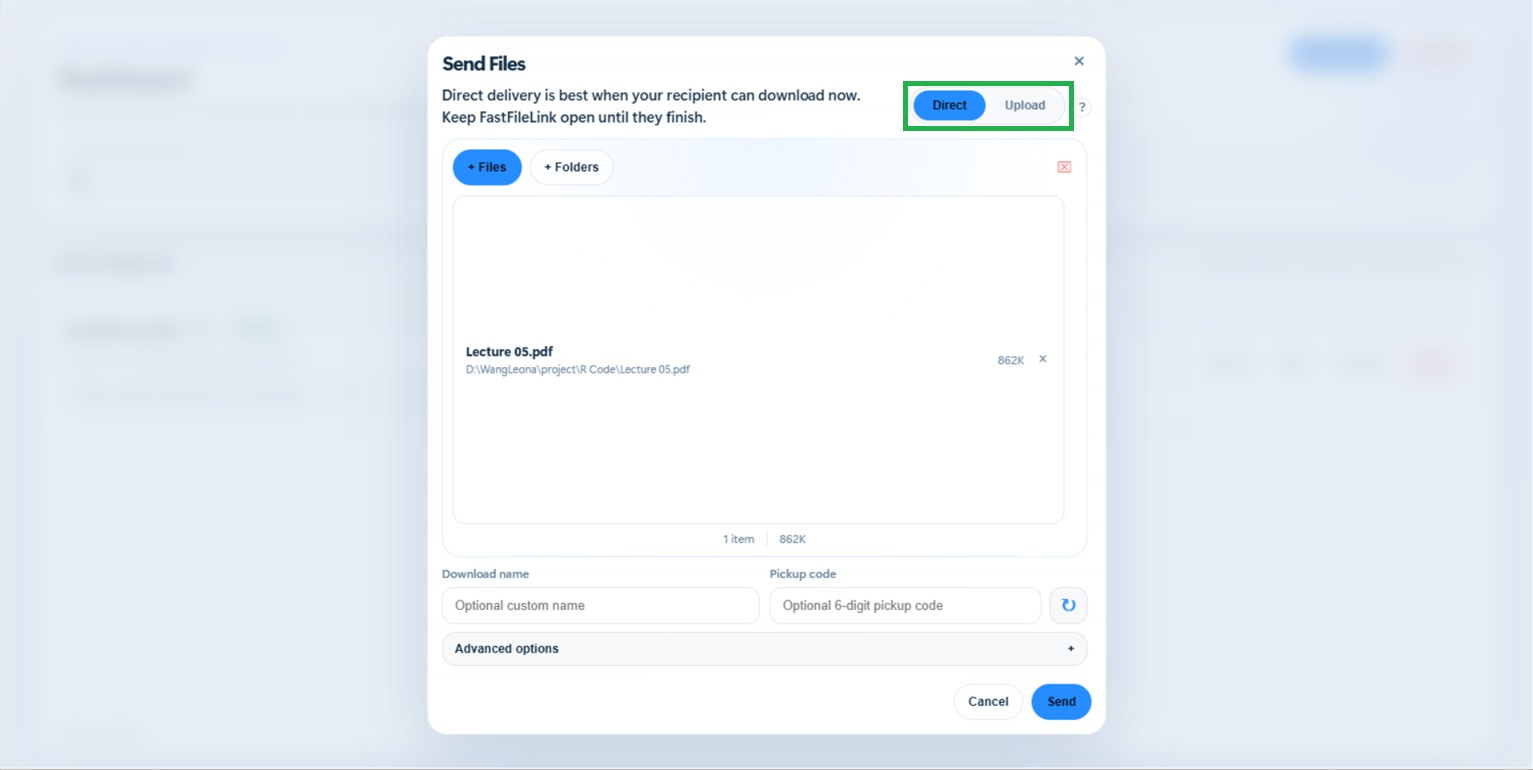
3-1. Direct Mode
Direct mode means the files sends directly from this computer. Your recipient can download as soon as you send the link. Speed and reliability depend on both connections and distance, especially across countries. Note that you need to keep FastFileLink open until they finish.
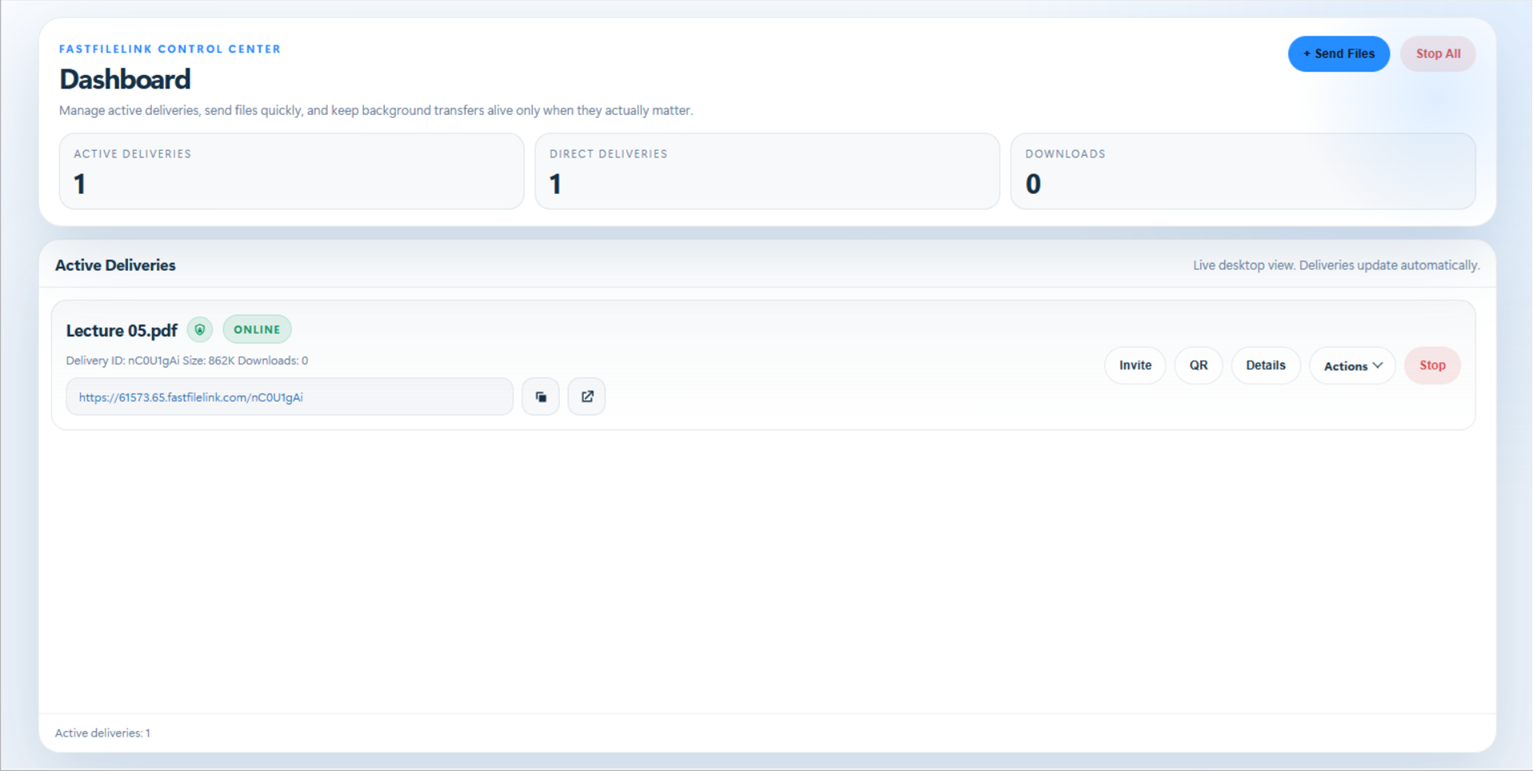
After clicking “Send”, you can share the link to receivers. To stop sharing, click “Stop”.
3-2. Upload Mode
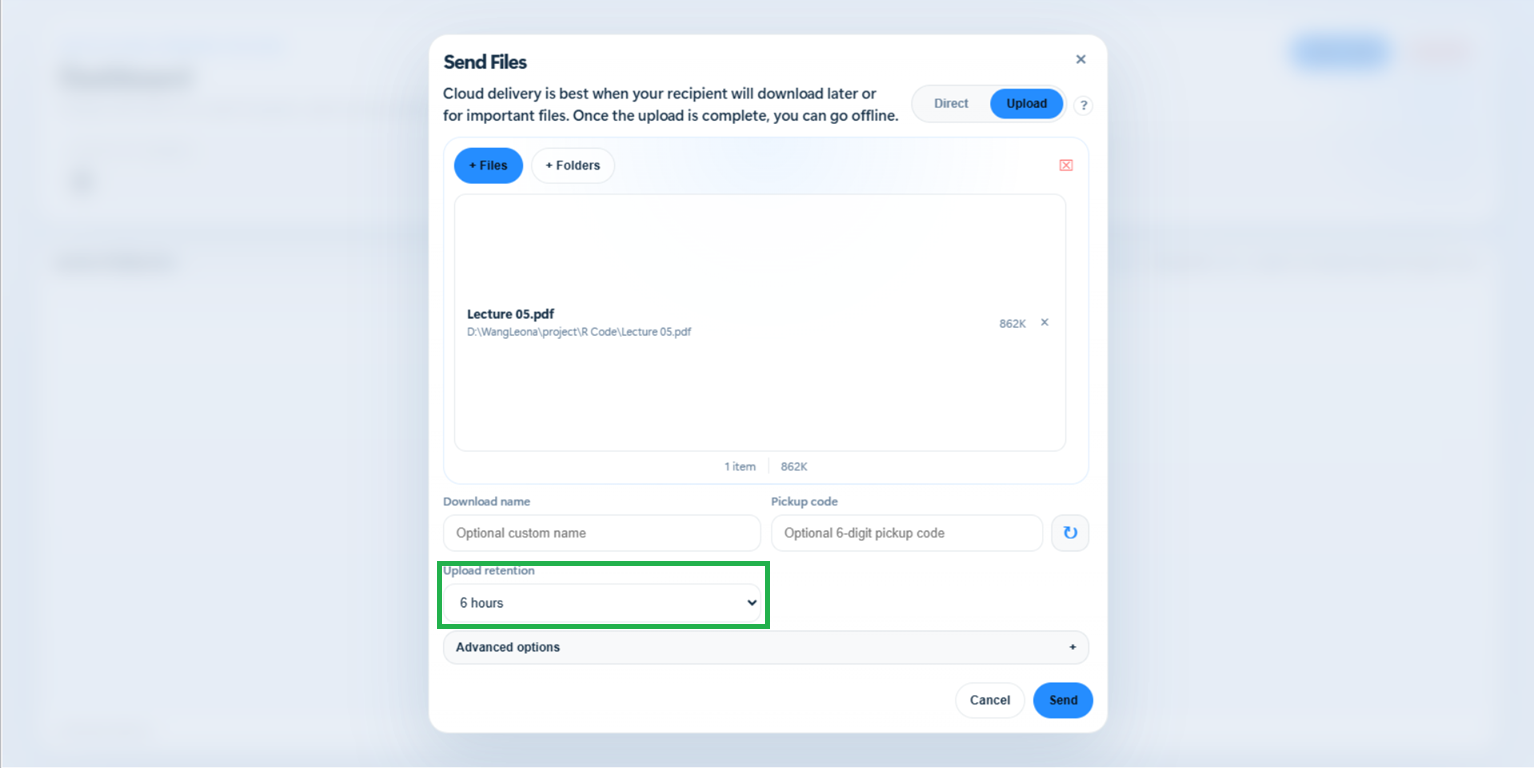
Upload mode uploads a cloud copy first through FastFileLink's global high-speed network. Recipients can download only after the upload completes. Recipients will usually have a smoother download, and you can go offline after the upload completes.
"You can choose how long to keep this file. Once selected, click “Send”.
As with Direct Mode, you can share the link with recipients. To stop sharing, click “Remove”.
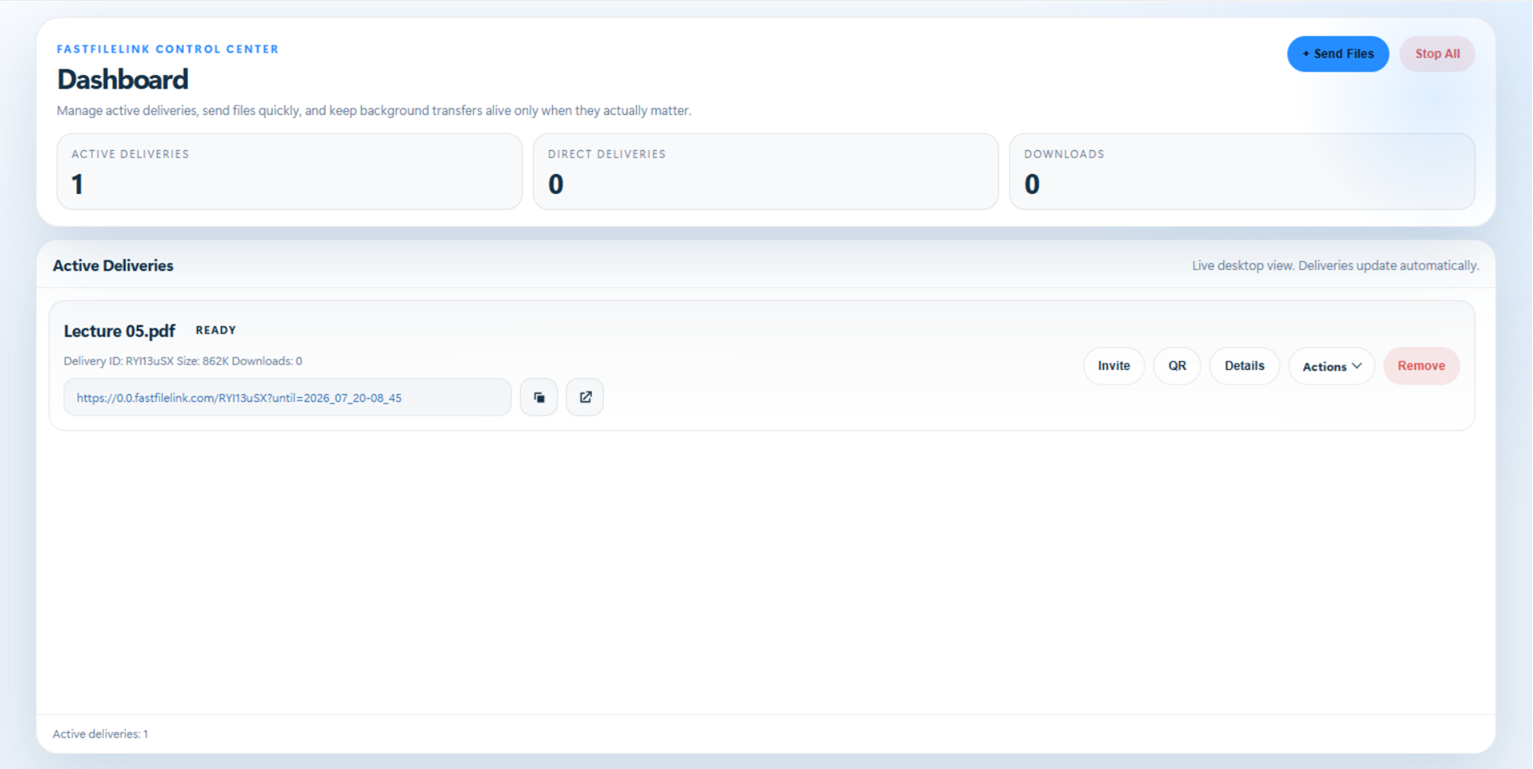
3-3. How to Select Files and Folders
FastFileLink supports uploading multiple files and folders at once. When selecting files, you can hold down the Ctrl key to choose multiple files simultaneously, or use your mouse to drag and select all the files you want to upload. In addition, files and folders can be mixed and uploaded together.
4. Advanced Functions
4-1. End-to-End Encryption
How to Enable E2EE
We provide an End-to-End Encryption (E2EE) feature. To enable it, go to “+ Send Files → Advanced Options → Enable E2EE”. If you want E2EE enabled for every upload, go to “Preferences → End-to-End Encryption”, and E2EE will be turned on for each upload.
How to enable E2EE

Share the Encryption Key (Upload Mode Only)
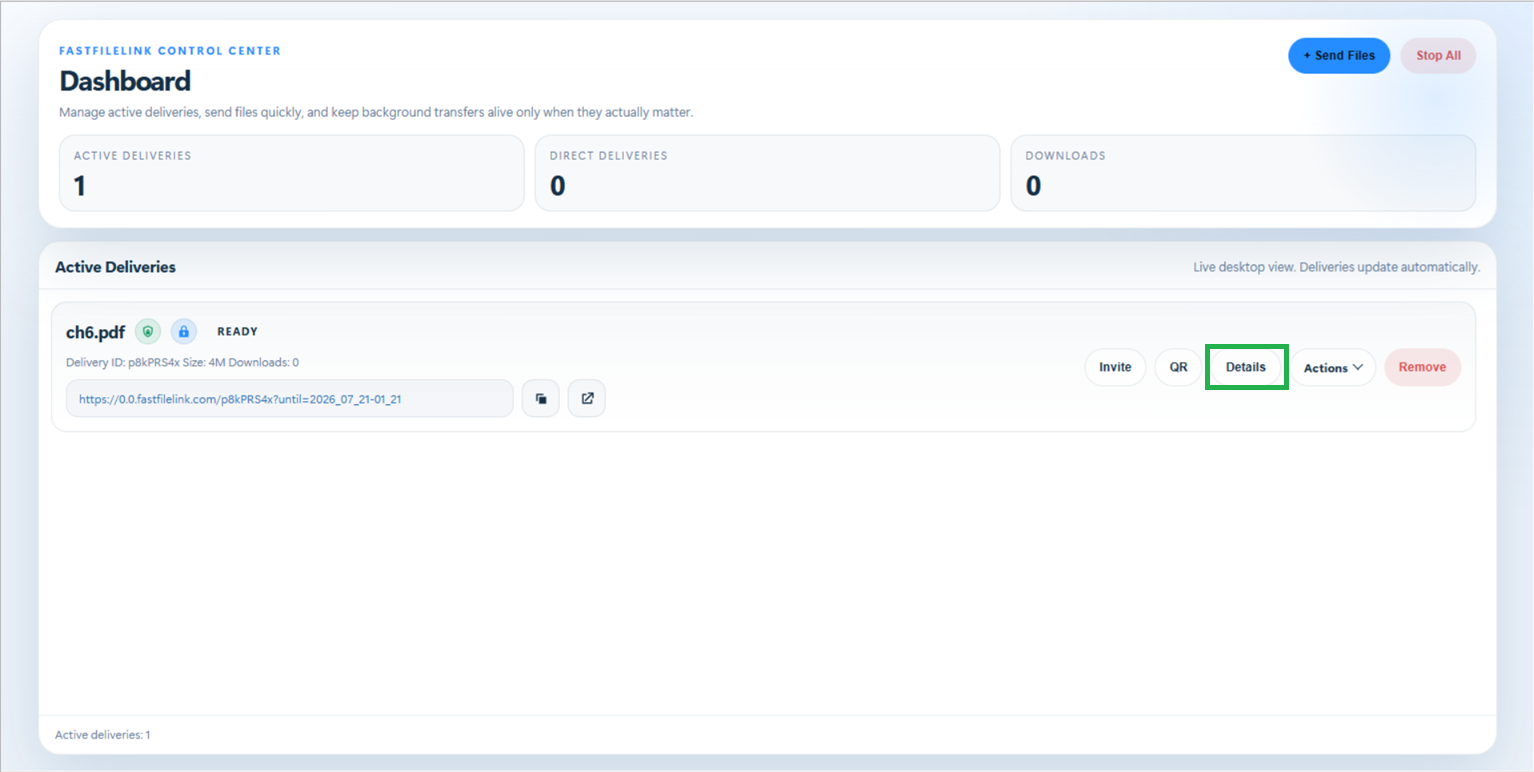
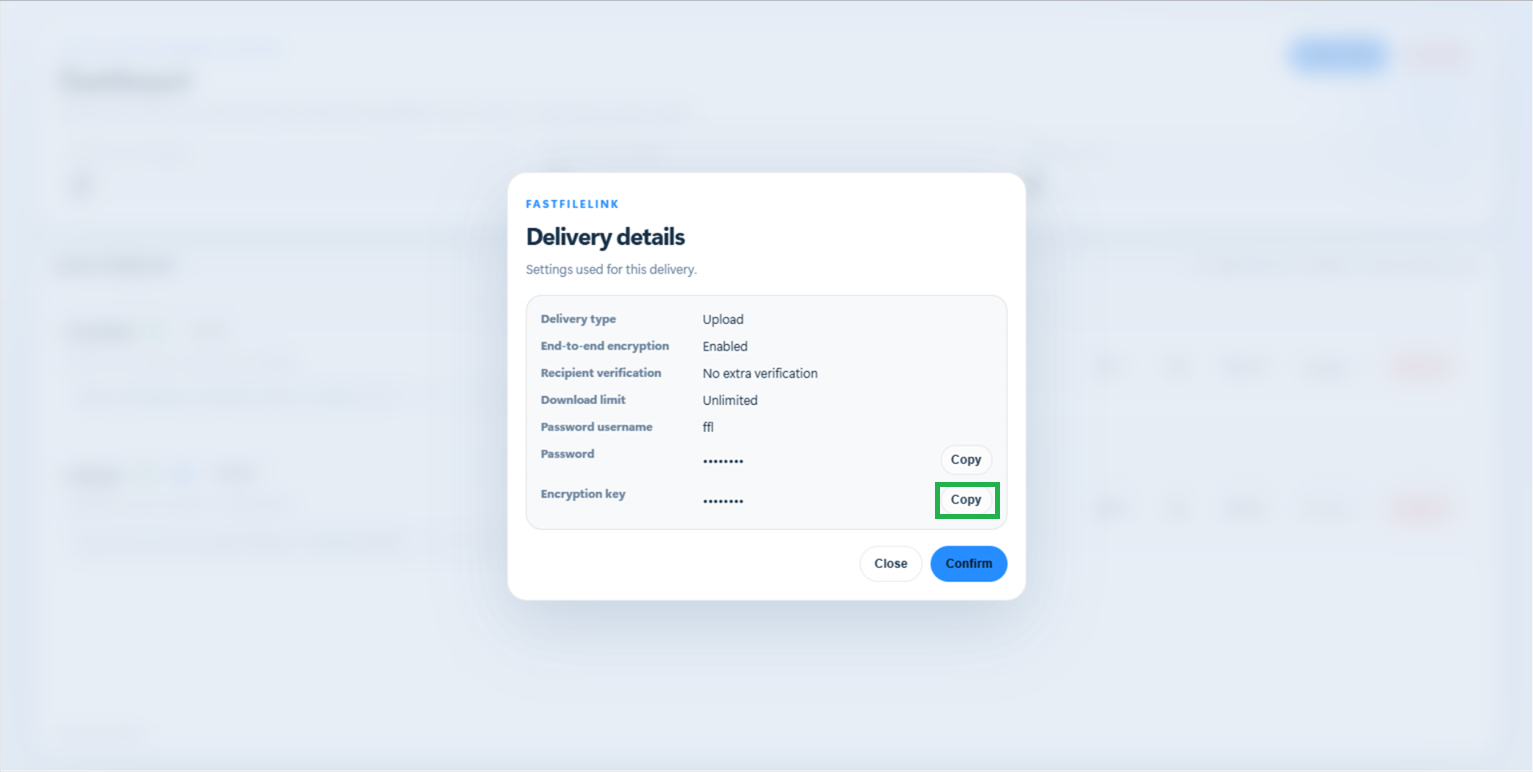
After sharing a file, click "Details" in the generated field to view and copy the encryption key. Send this key to the recipient through a secure channel so they can decrypt the file.
Copy the encryption key and share it with the recipient
Why do I need to save the encryption key?
The encryption key is required to decrypt the shared file.
Direct Mode: Encryption and decryption are performed entirely on the sender's and recipient's devices. The transferred data cannot be decrypted during transmission.
Upload Mode: Although encrypted files are stored on FastFileLink's servers, FastFileLink never stores your encryption key. This means we cannot decrypt your files or recover the key if it is lost.
If you lose the encryption key, the encrypted file cannot be decrypted. Make sure to save the key and share it securely with your recipient.
For more information about how it works, please refer to our Technical FAQ article.
4-2. Password Protection
To prevent others from maliciously downloading your files if your link is leaked, you can use the password protection feature to secure your files.
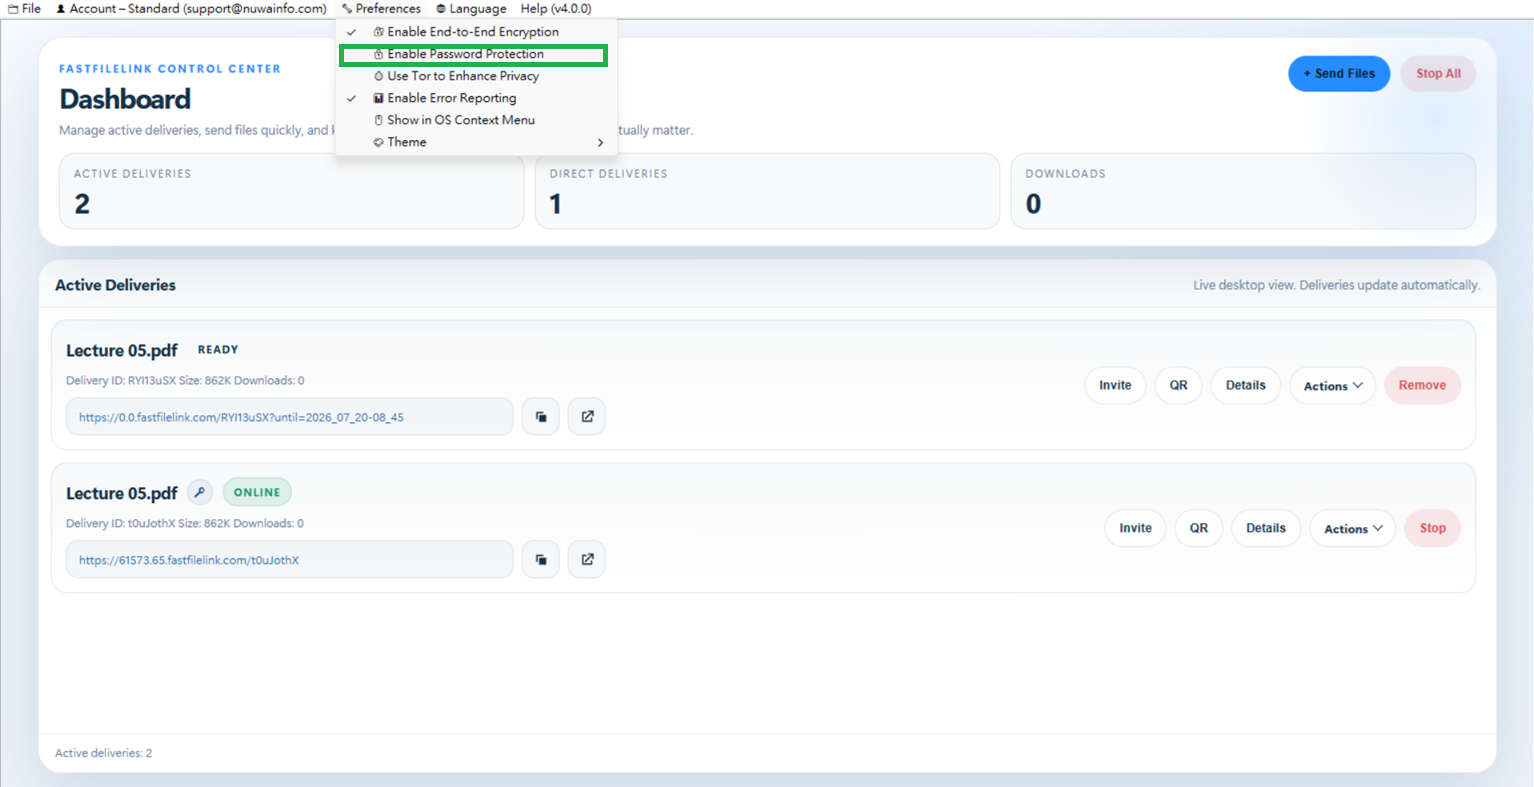
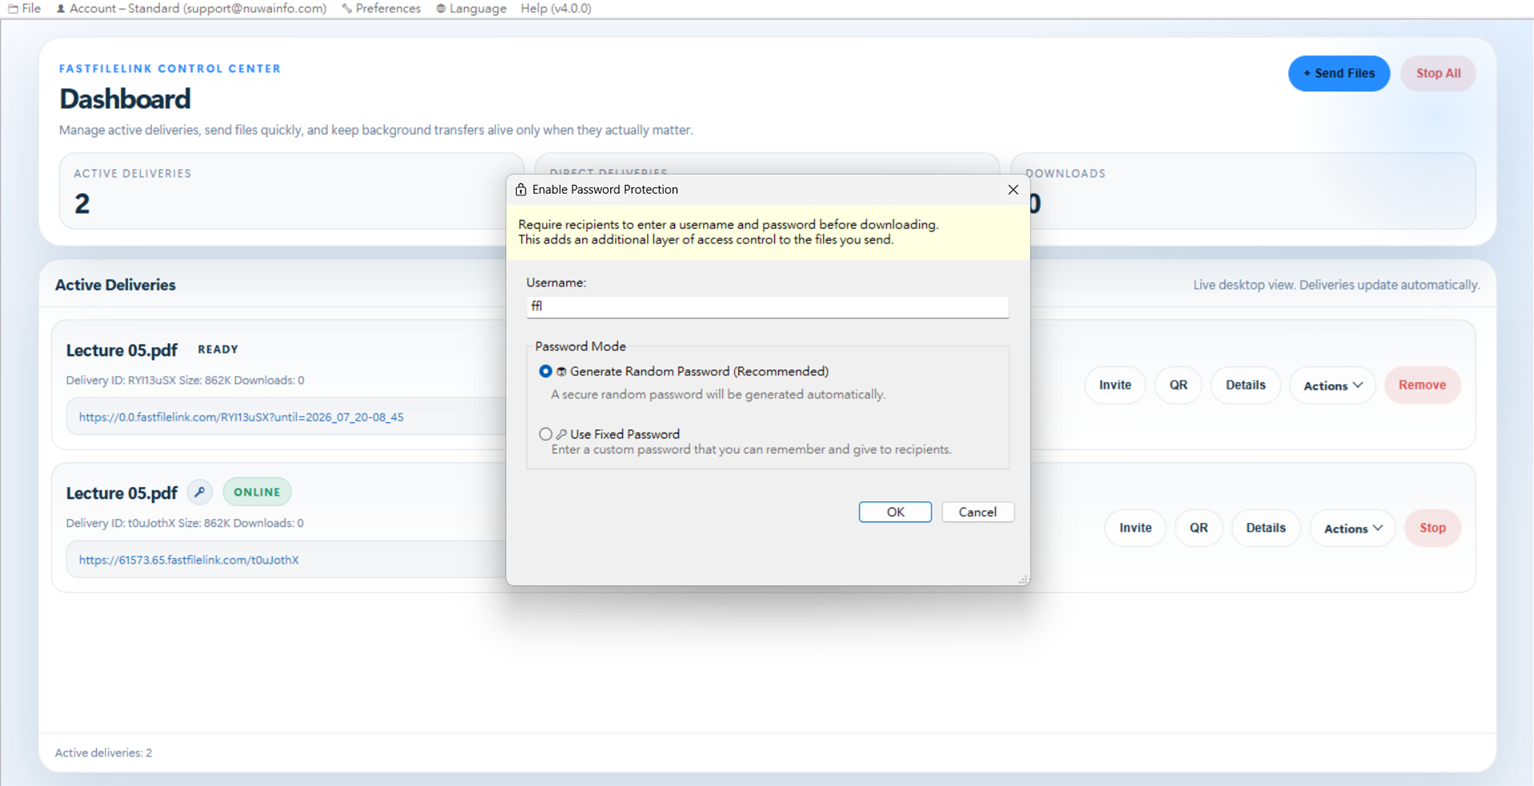
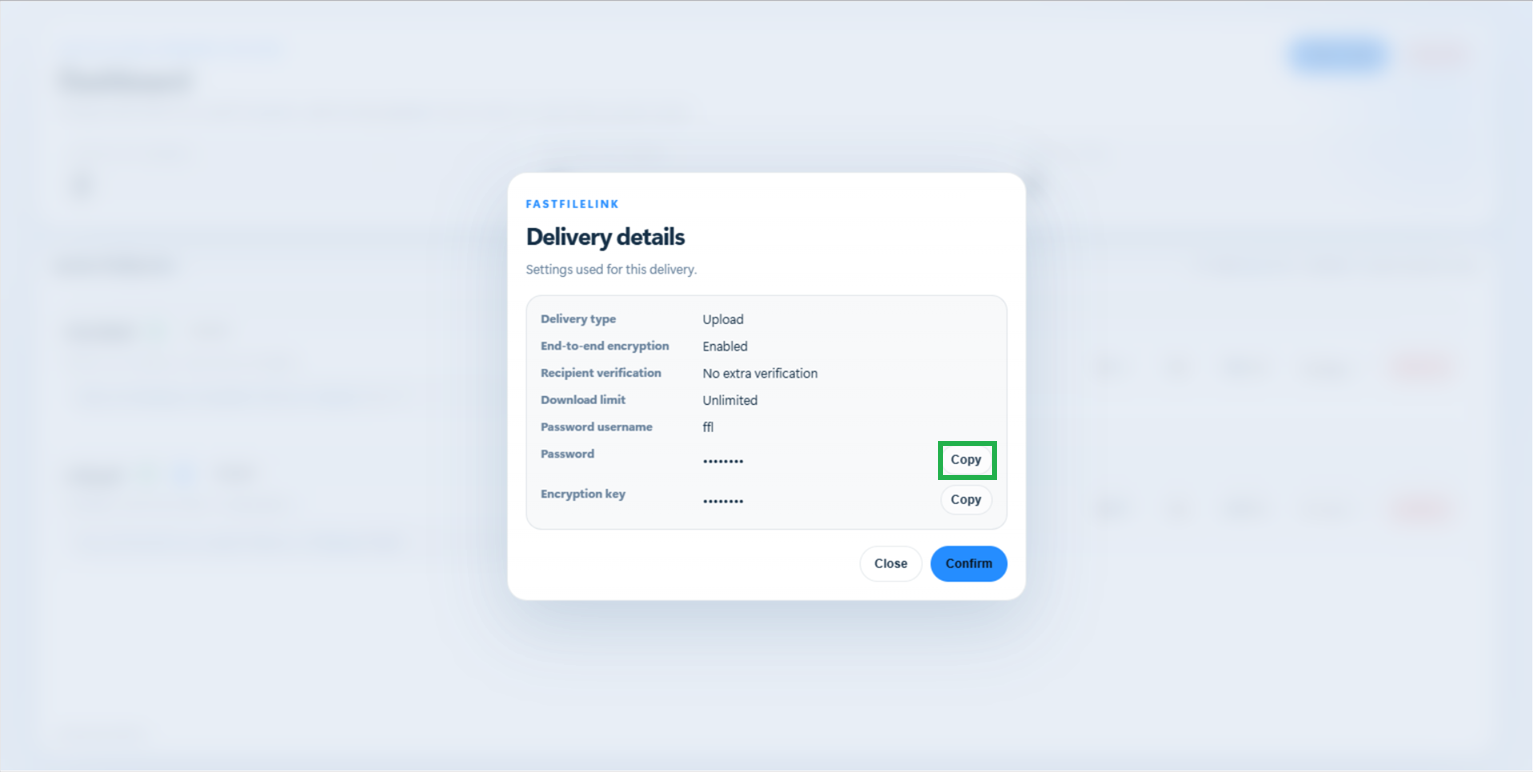
After sharing, click “Details” in the generated field to copy the password and share it with the recipient.
Copy password and share with recipient
4-3. Use Tor to Enhance Privacy
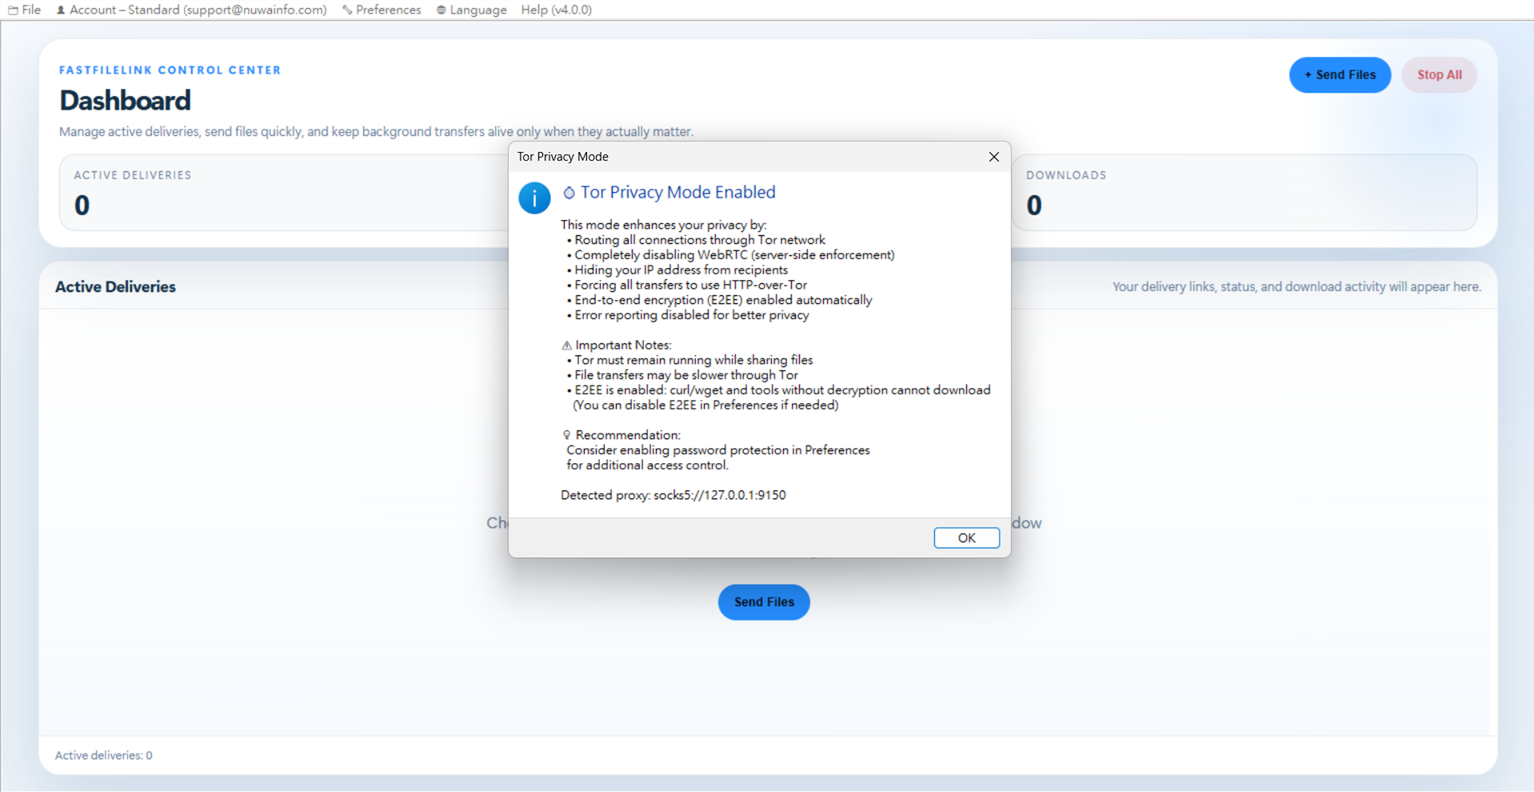
You can use the Tor network to hide the origin of your files.

4-4. Recipient Verification and Sender Notification
You can use the recipient verification feature to ensure that your files cannot be downloaded by unauthorized people. For example, you can set a pickup code or require recipients to sign in with a specific email address before they can download the files. You can also configure email notifications to be sent to a designated mailbox whenever someone downloads the files. If you need confirmation that the recipient has successfully received the files, you can require them to submit a download receipt.
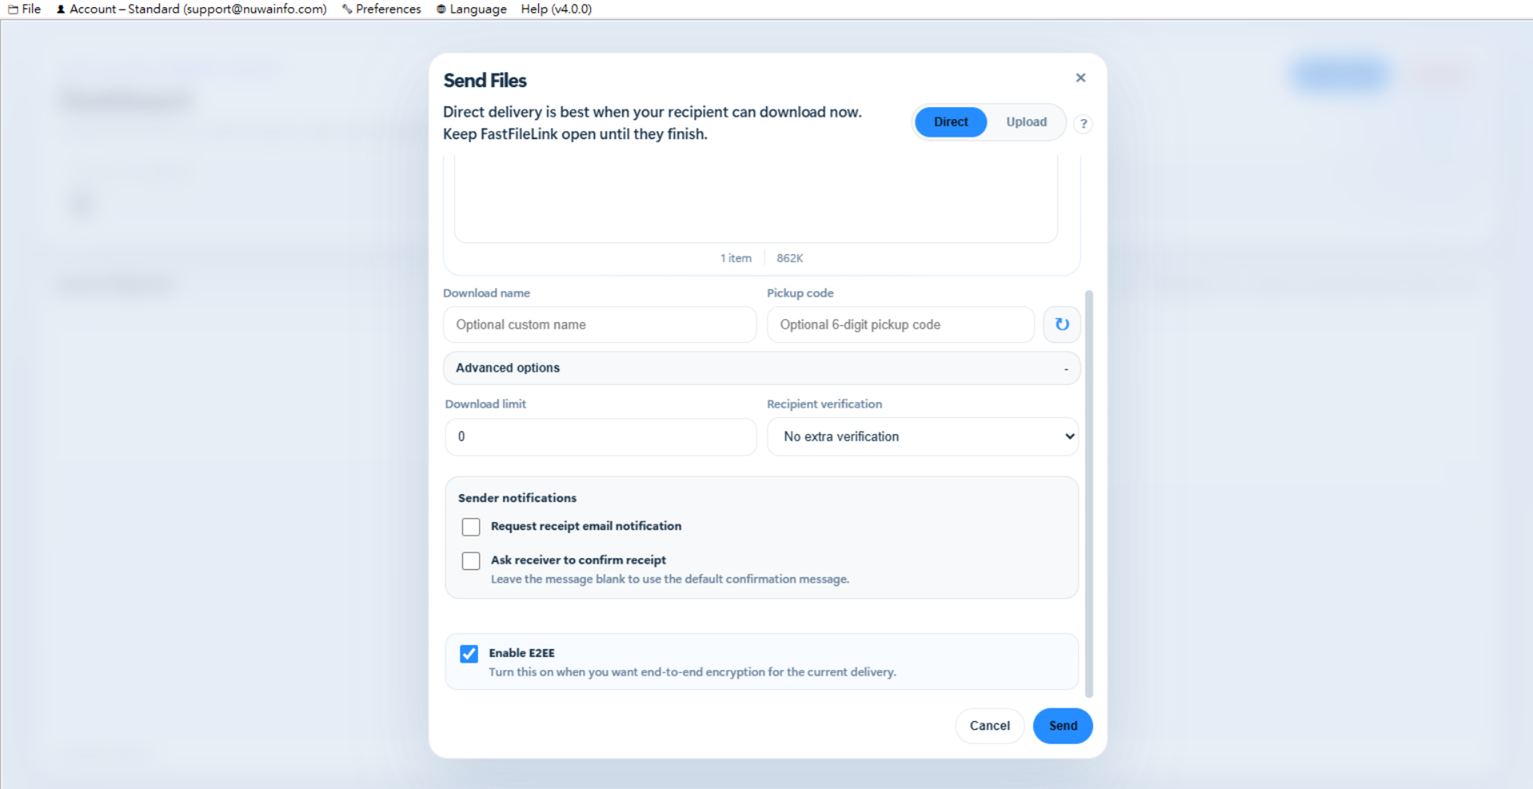
You can choose one of the following recipient verification methods to control how files are accessed:
- One-time Pickup Code : A system-generated or custom code is required to download the file.
- Email Verification (OTP) : Recipient must verify ownership of the email address via OTP. Access is granted only after successful email authentication. Ensures the file is accessed by the intended email owner.
- Recipient Key Code : Recipient must enter a pre-defined key code to access the file. Suitable for controlled sharing with known recipients.
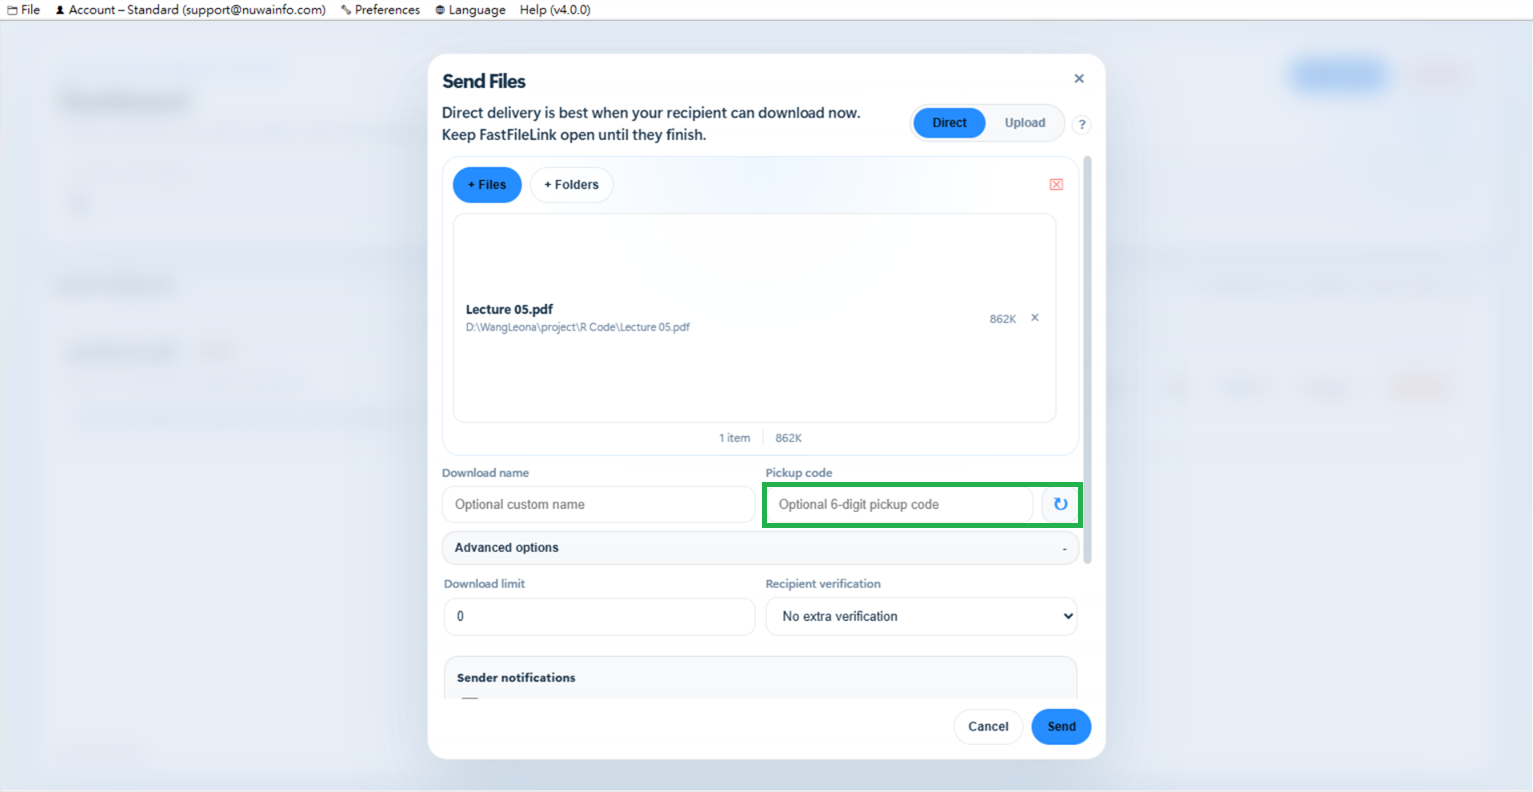
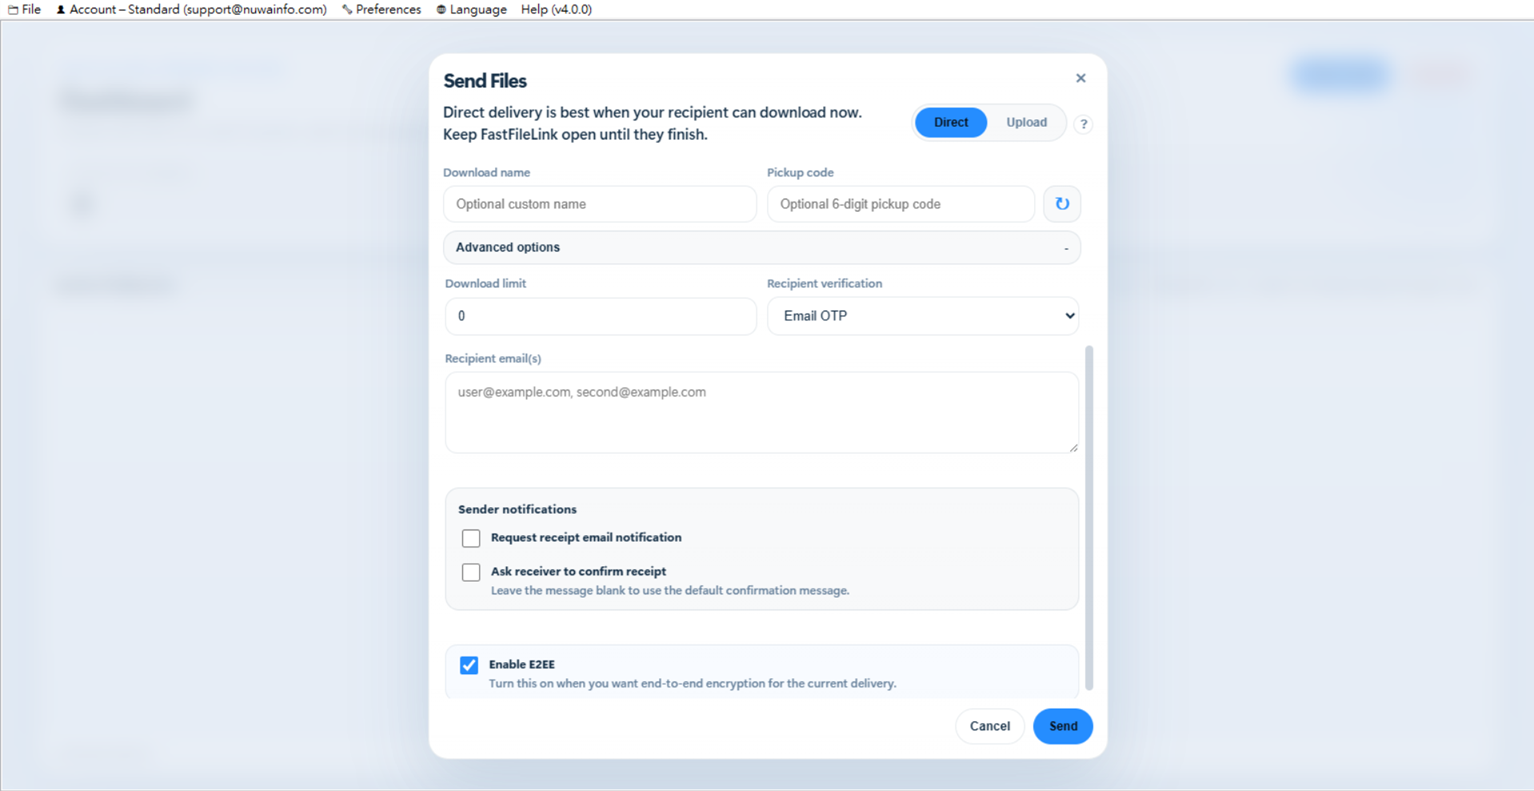
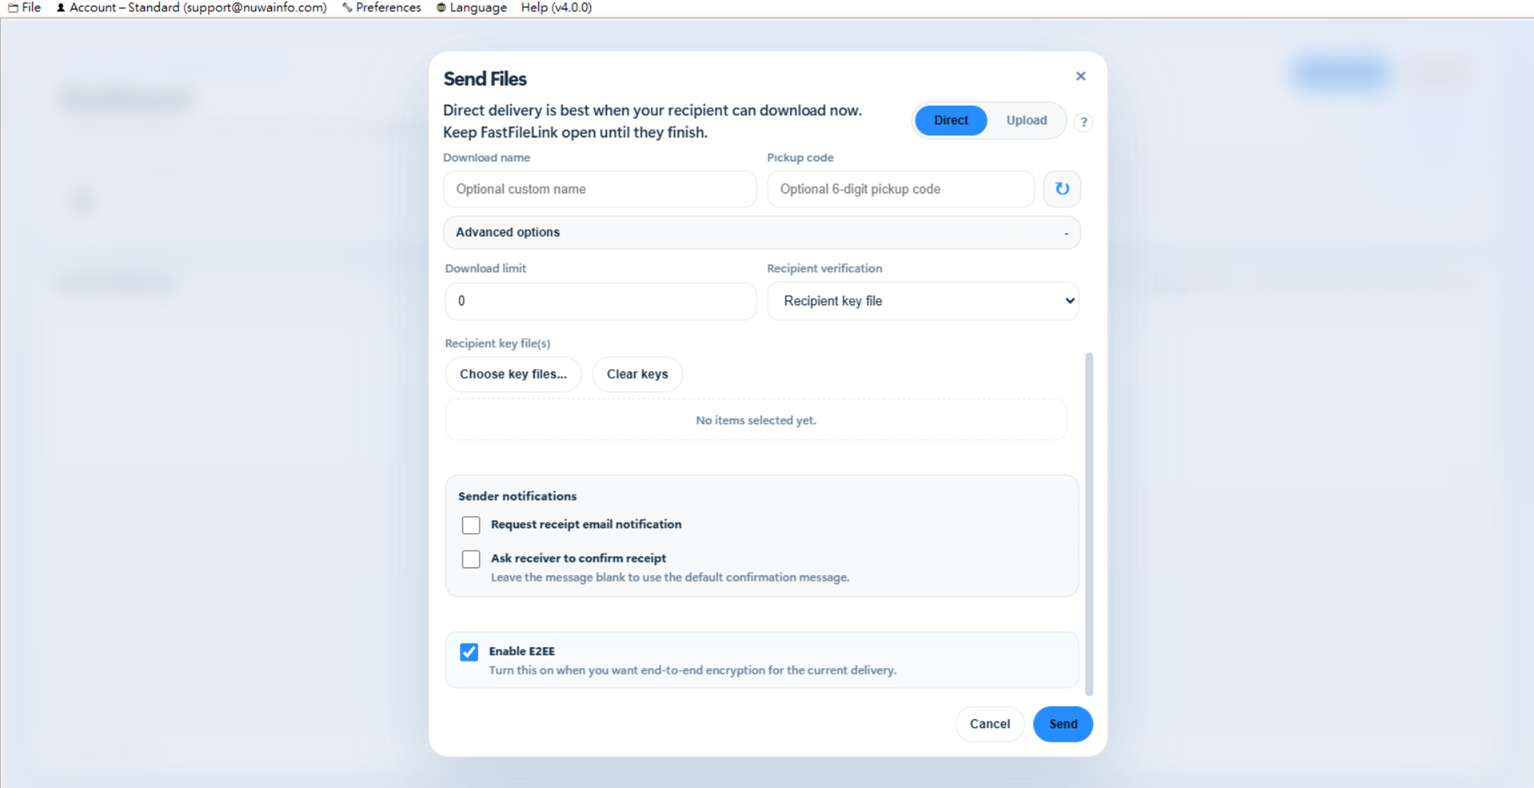
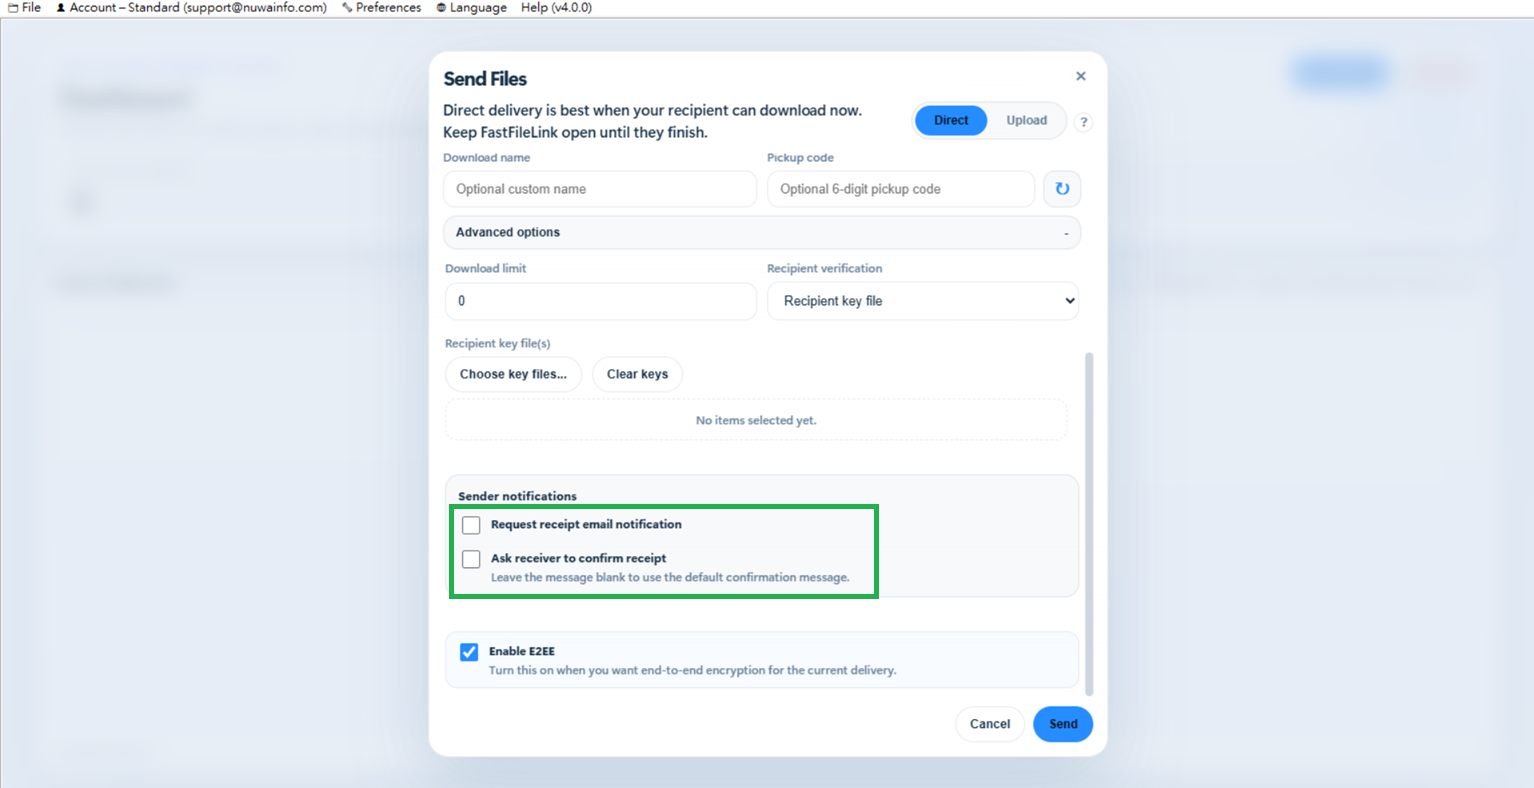
Senders can configure notification behavior after file download events:
- Request Receipt Email Notification : An email notification is sent to a designated sender email when a file is downloaded. Requires sender account authentication to configure. Used for audit tracking and monitoring downloads.
- Ask Receiver to Confirm Receipt : Recipient can optionally confirm receipt after downloading the file. The confirmation is not mandatory, and files can still be fully accessed without submitting it. This feature is mainly used as an optional message channel for recipients to leave feedback or notes to the sender. If you only needs to be notified whether the file has been downloaded, the email notification feature should be used instead.
4-5. CLI Version
In addition to the GUI version, we also offer a CLI version for your use. If needed, you can download it from our GitHub repository.