Complete Branding Feature Tutorial: Build Your Own Branded Download Page
Posted on 週三 03 六月 2026 in Blog
Quick Navigation
- 1. Branding Feature Overview (Quick Introduction)
- 2. Step-by-Step Tutorial: Creating a Branding Page
1. Branding Feature Overview (Quick Introduction)
The branding feature allows you to fully customize the appearance and content of your file download page.
When you upload files and share download links, users will no longer see the default system page — instead, they will see a branded page designed by you.
The Branding feature allows users to fully customize the download page experience to match their brand identity. It supports custom brand names and page titles, logo uploads with redirect URLs, and flexible color settings for headers, text, backgrounds, and footers. Users can also personalize download page descriptions, navigation bars, and footer content to create a consistent and professional branded experience.
The main purpose of this feature is to enhance brand professionalism, unify the visual style of download pages, increase user trust, and provide a more complete and recognizable brand entry point for traffic and engagement.
2. Step-by-Step Tutorial: Creating a Branding Page
In the following example, we will walk through how to create a branded download page step by step.
If you want to quickly generate a branded page using AI, you can refer to Build Your Own Branded Download Page Using AI.
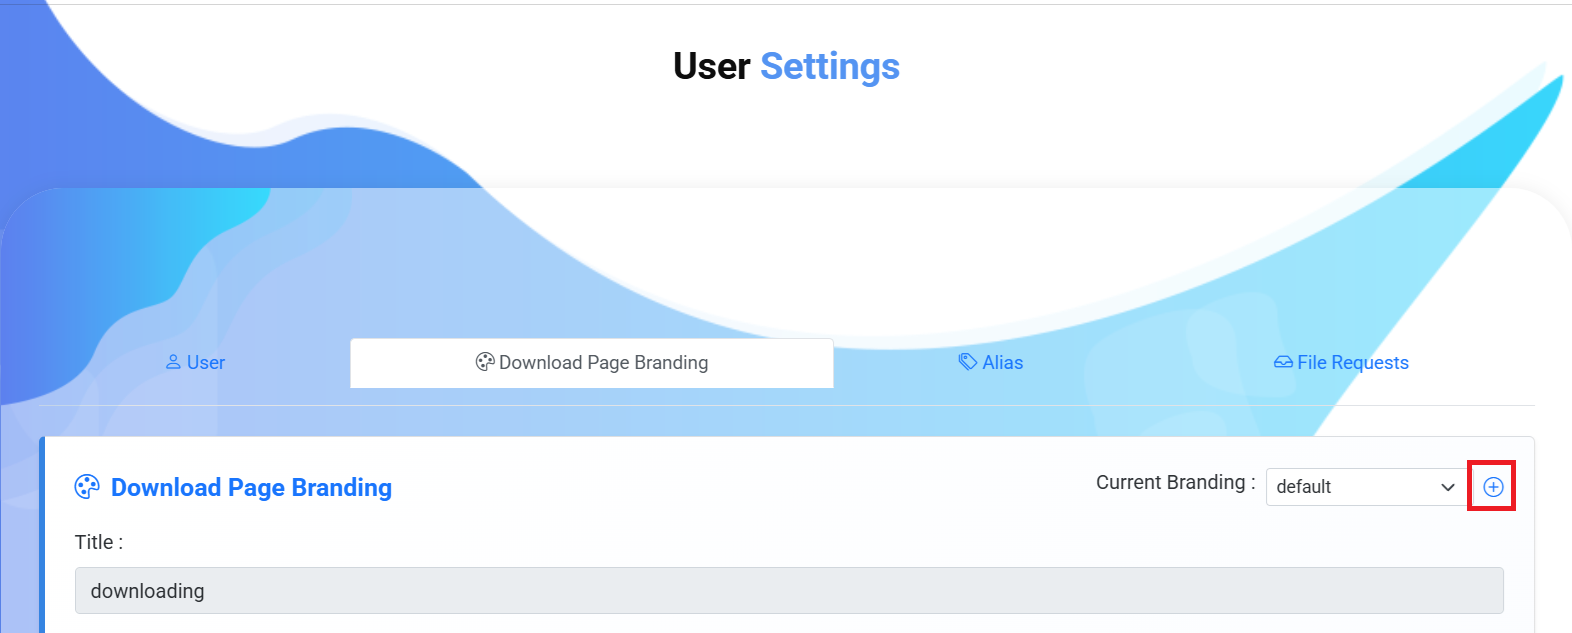
Step 1: Create a Brand
Before customizing the download page, you need to create a brand first. Since the system initially uses the default download page, adding a brand is required before you can access and configure branding settings.
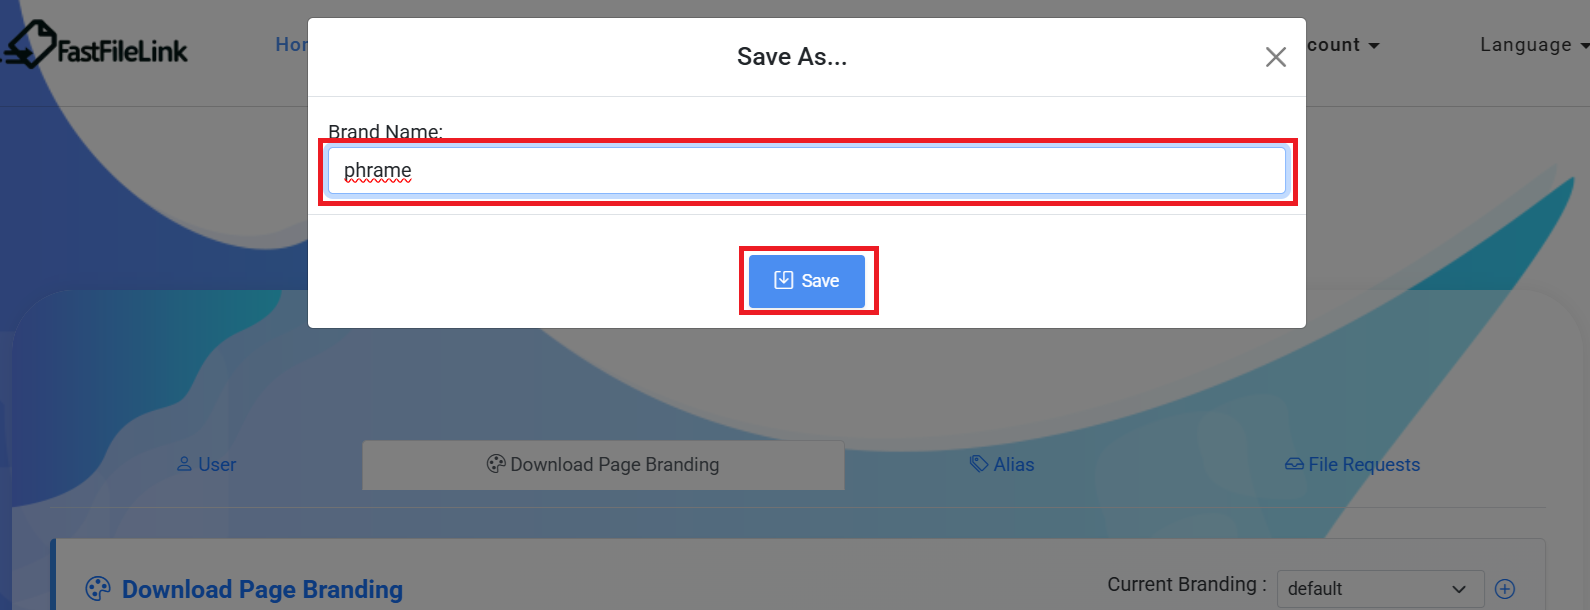
Click the "+" button to create a new brand
Enter the brand name and save
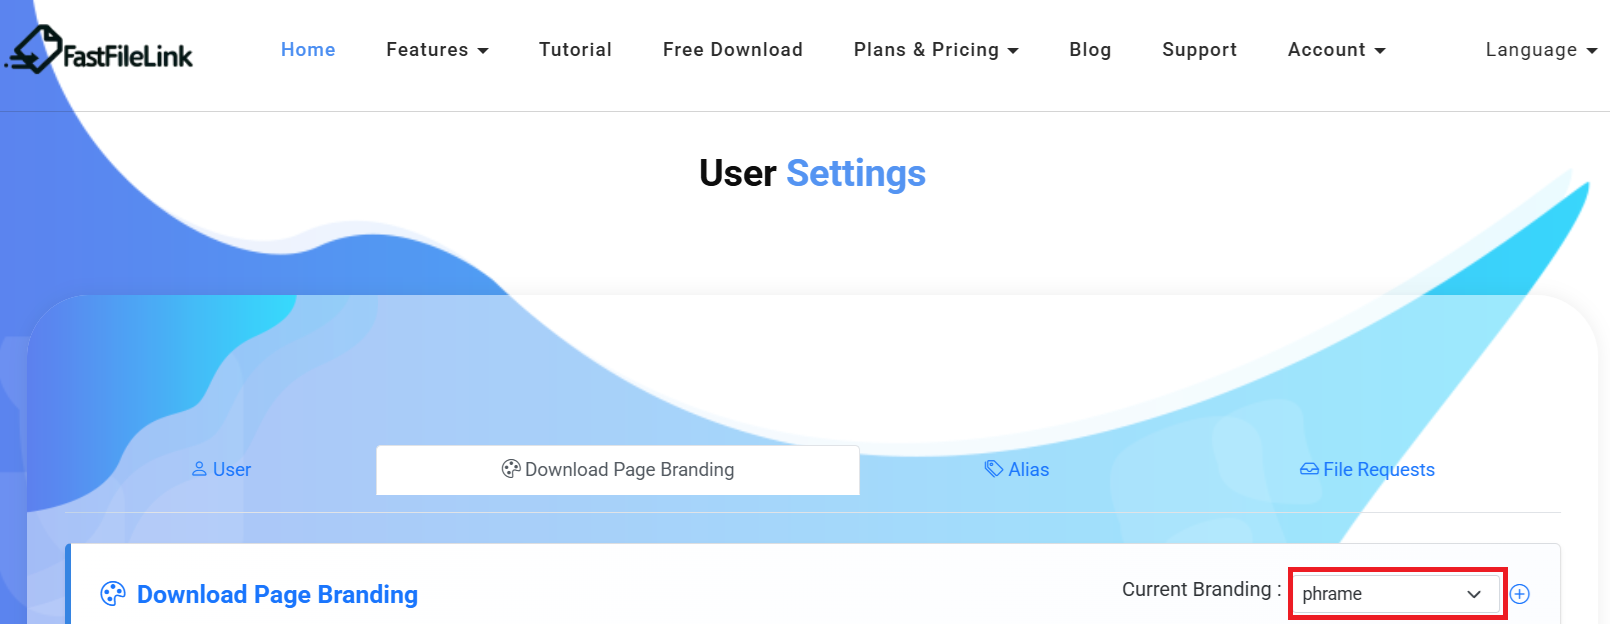
Once the brand is successfully created, you can start customizing it
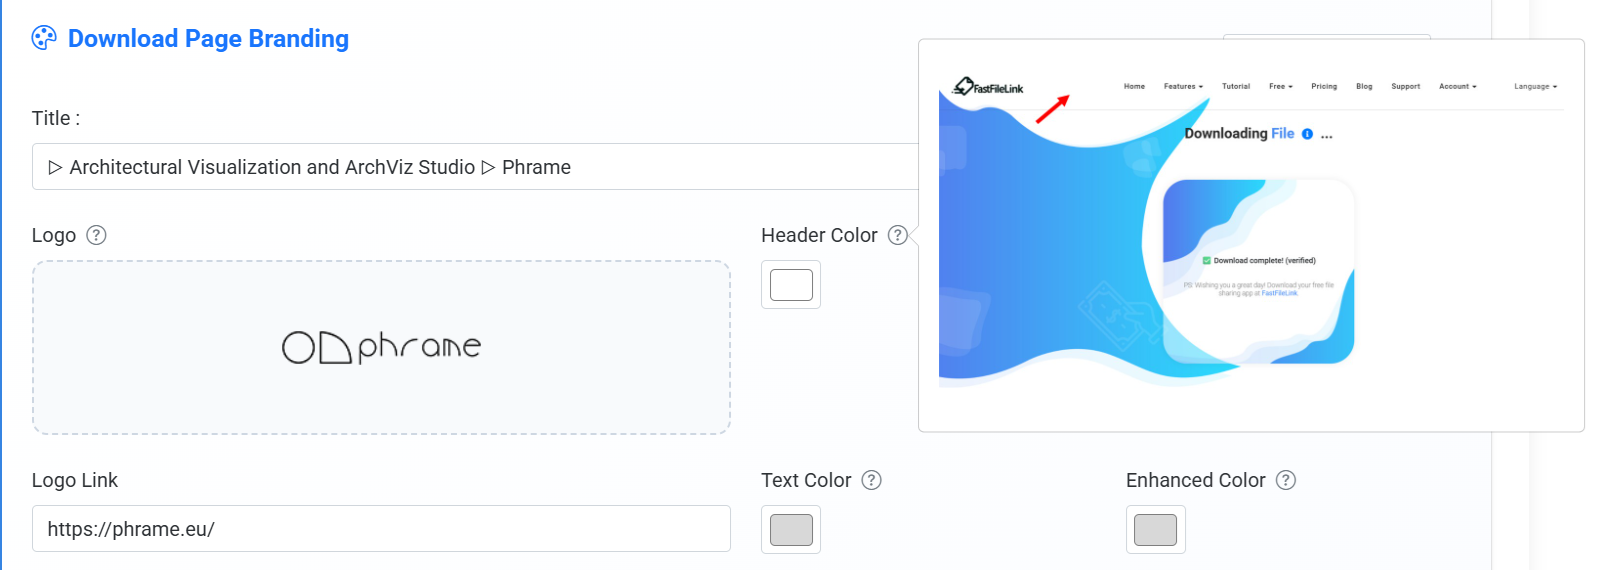
Step 2: Configure the Brand
There are many customizable sections available in the branding settings. If you're unsure which part of the download page a setting affects, click the "?" icon to preview the corresponding area on the page.
Click "?" to see where changes apply on the download page
Below are the steps to configure the brand:
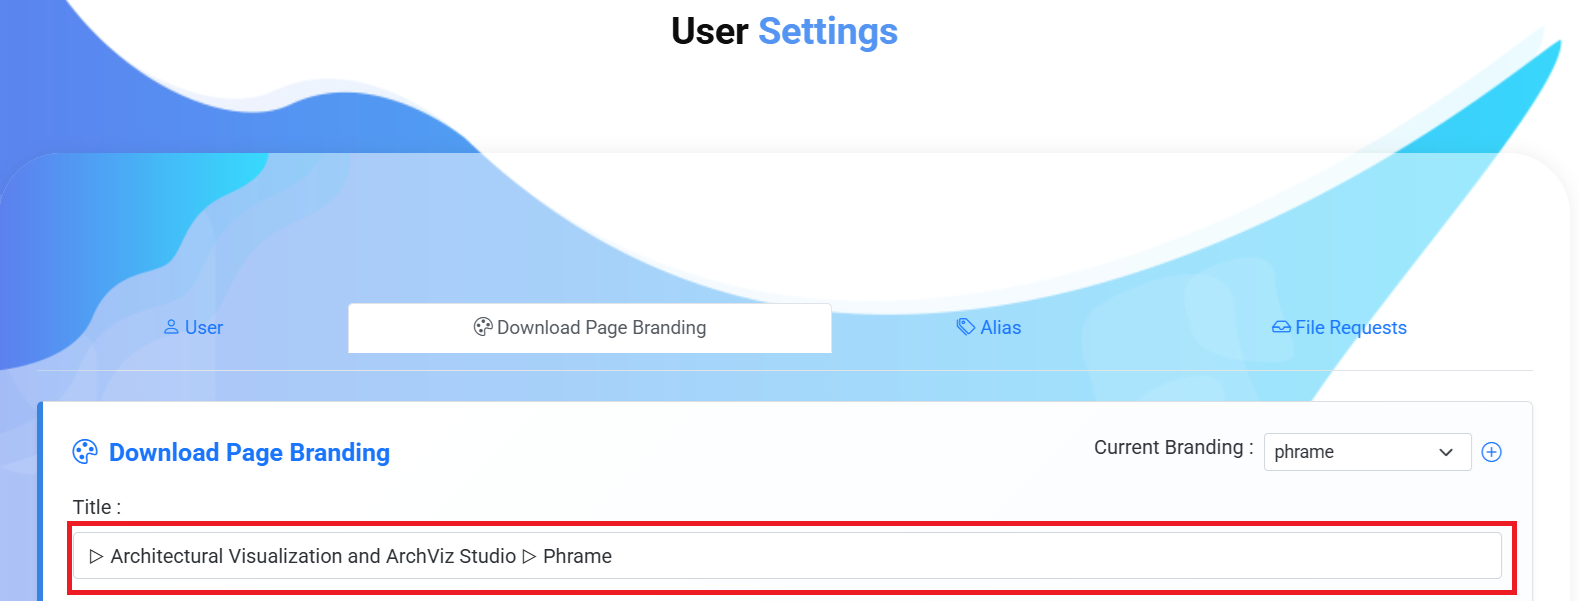
Enter the title displayed on the browser tab
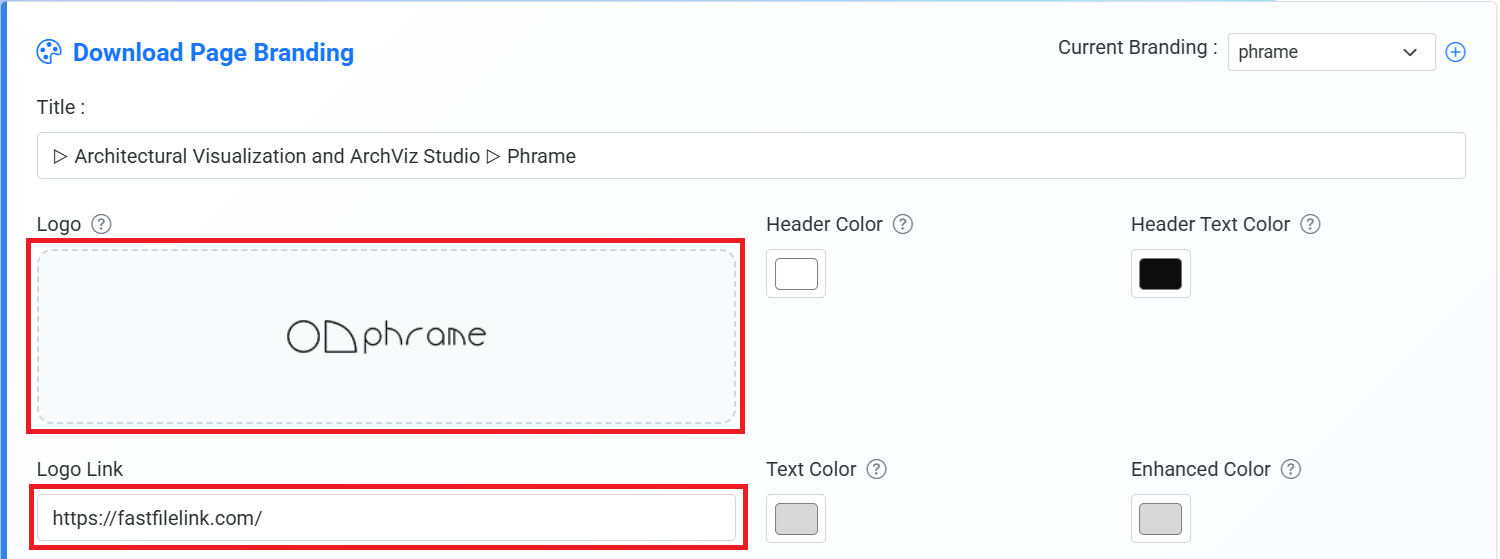
Upload a logo image (optional if your brand does not have one), and enter the redirect URL when the logo is clicked (such as your official website)
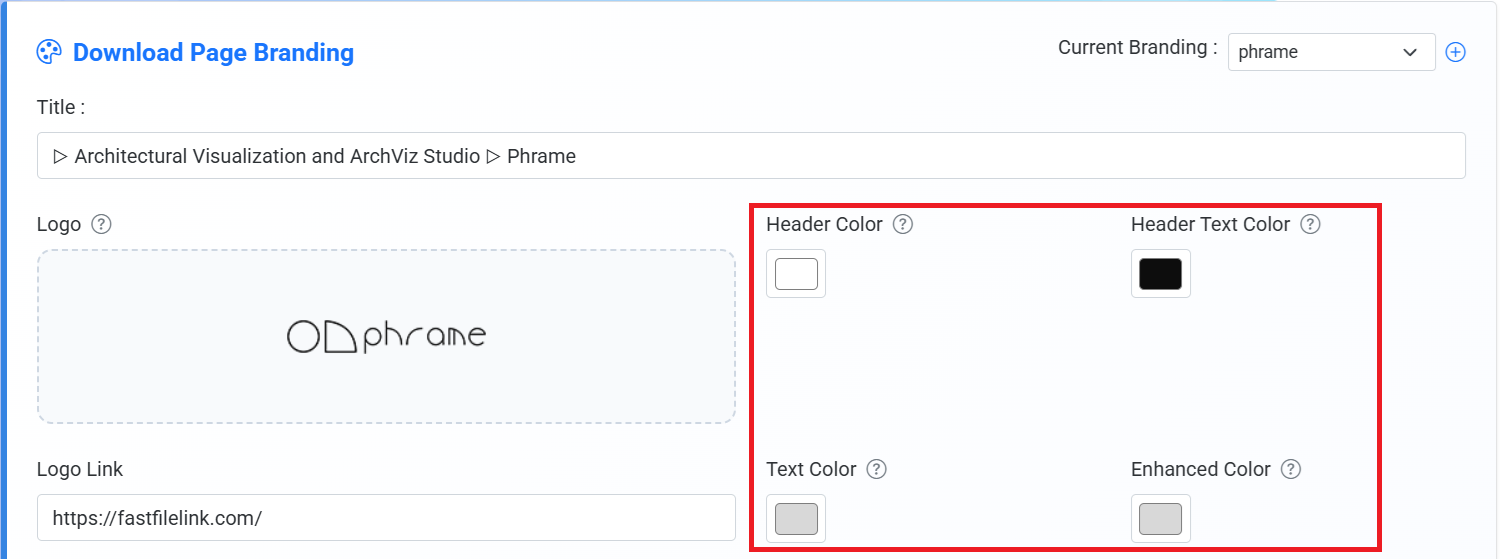
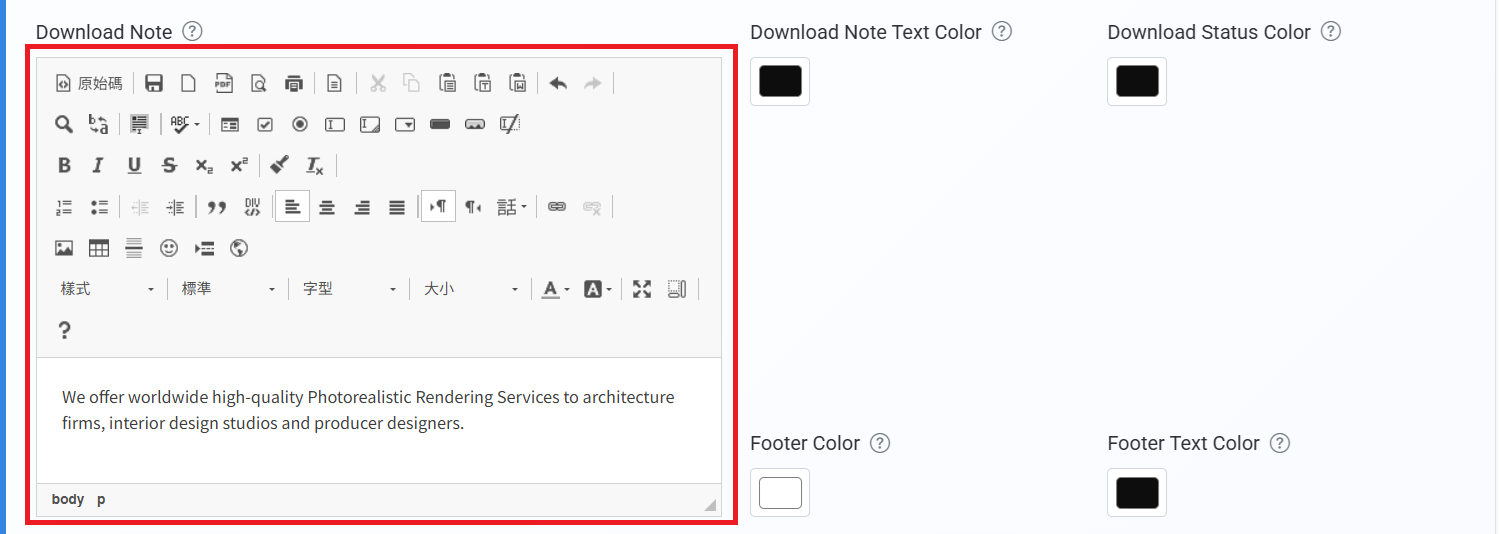
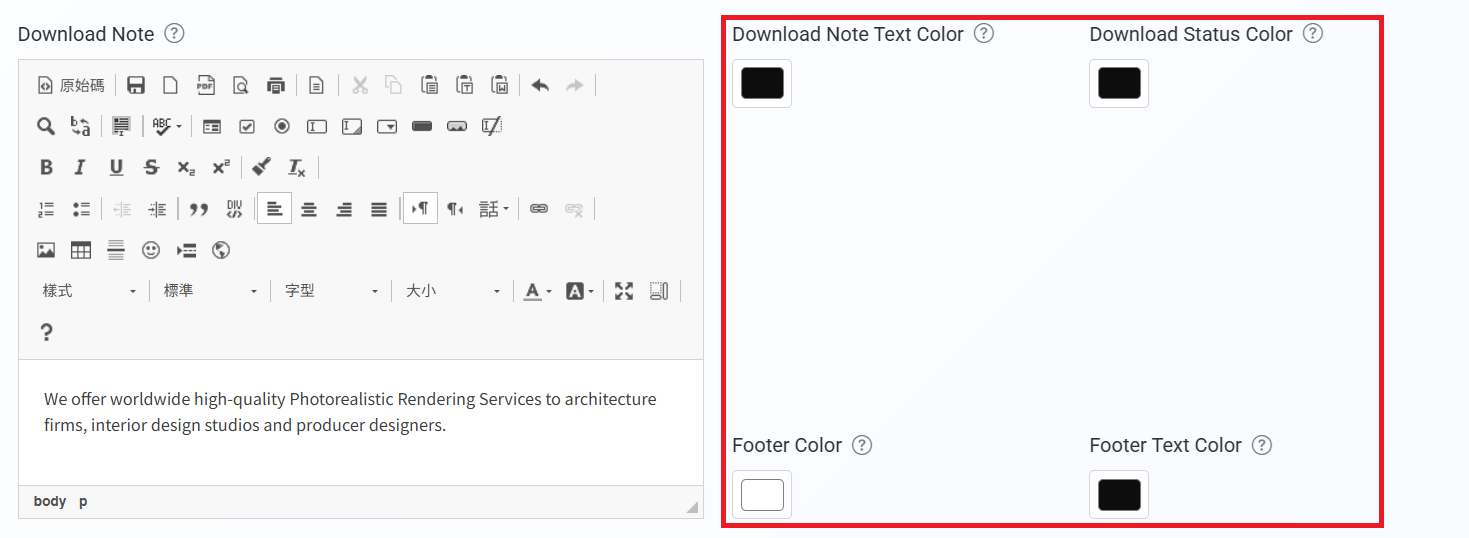
Customize the header background color, header text color, download page text color, and accent color
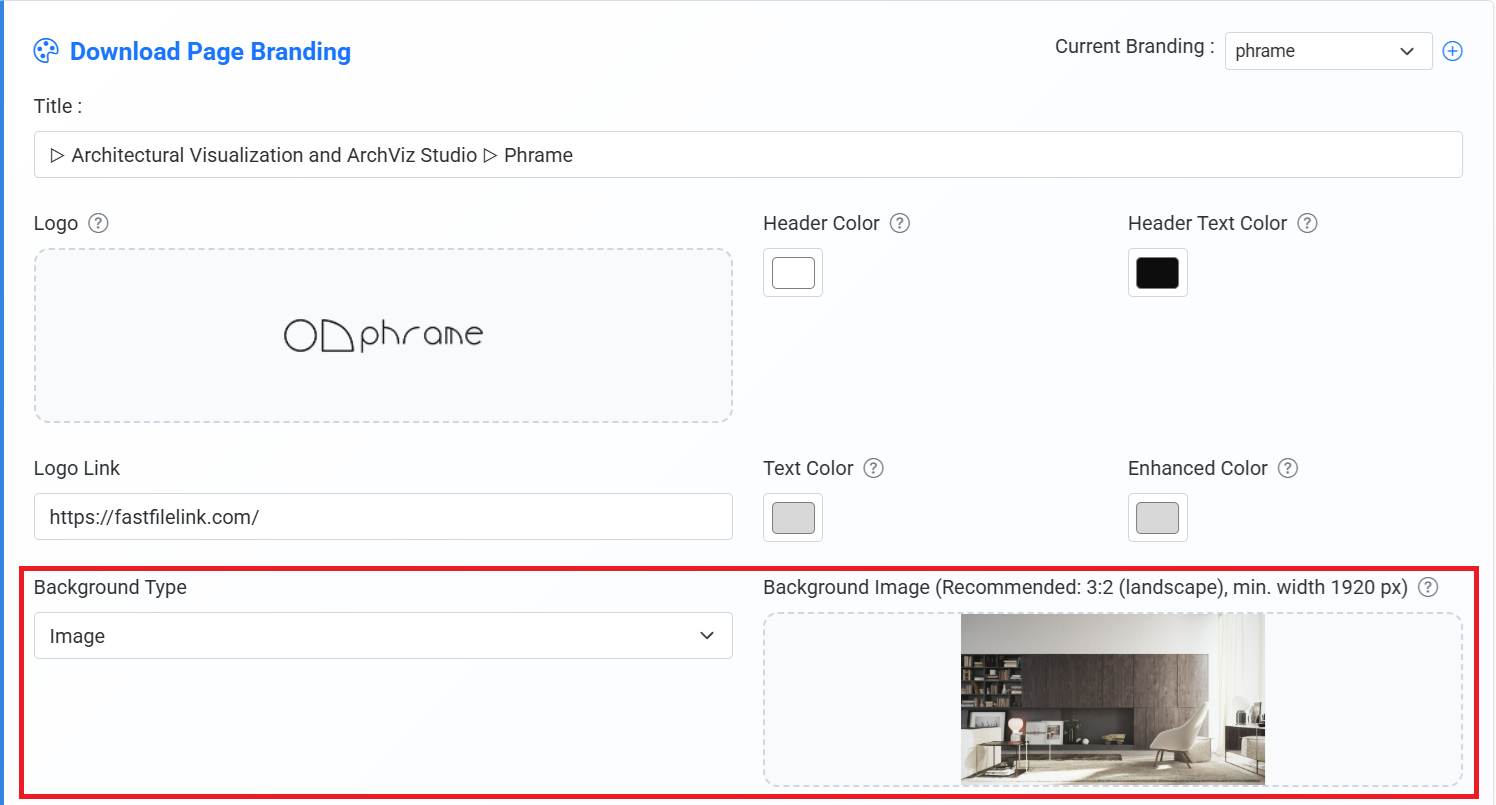
Select a background style (solid color/image). If using an image background, upload a background image (recommended ratio: 3:2, minimum width: 1920 px)
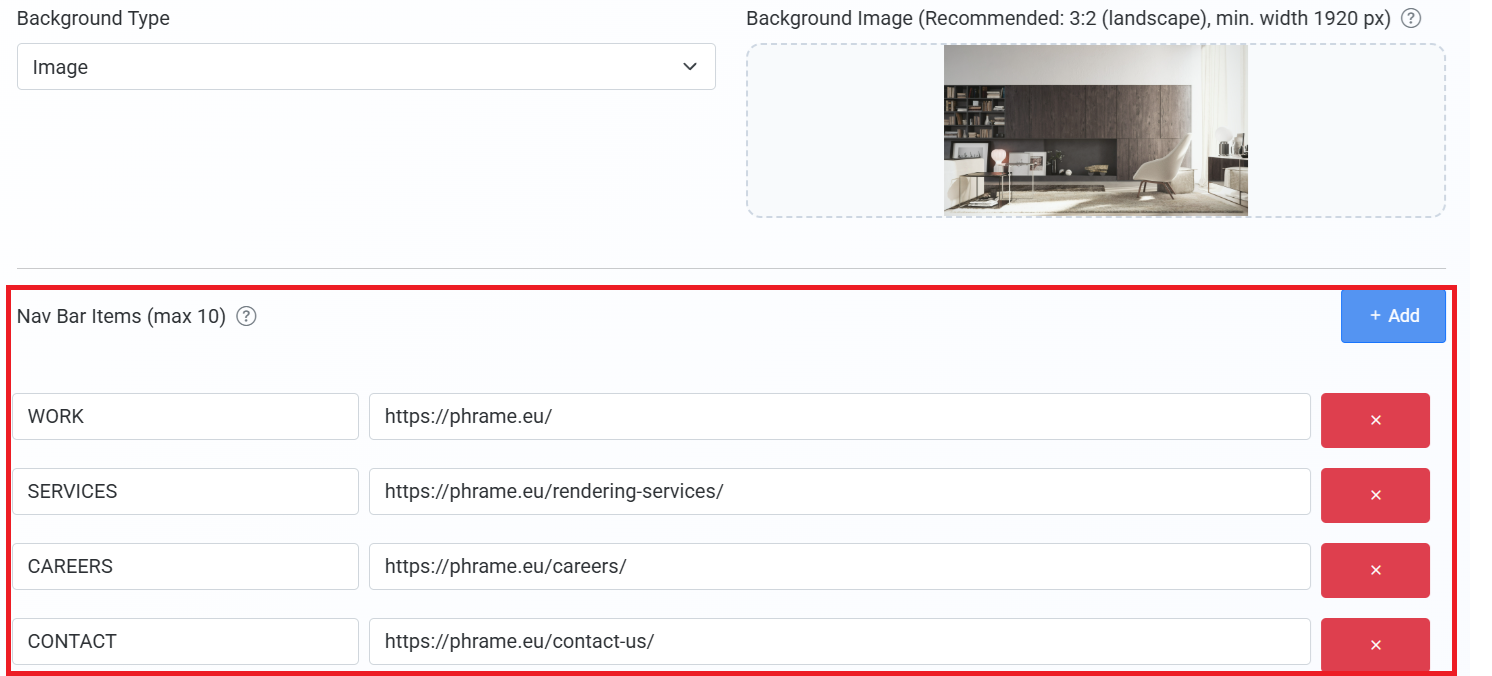
Configure the navigation bar and set links for each item
Enter the download instructions
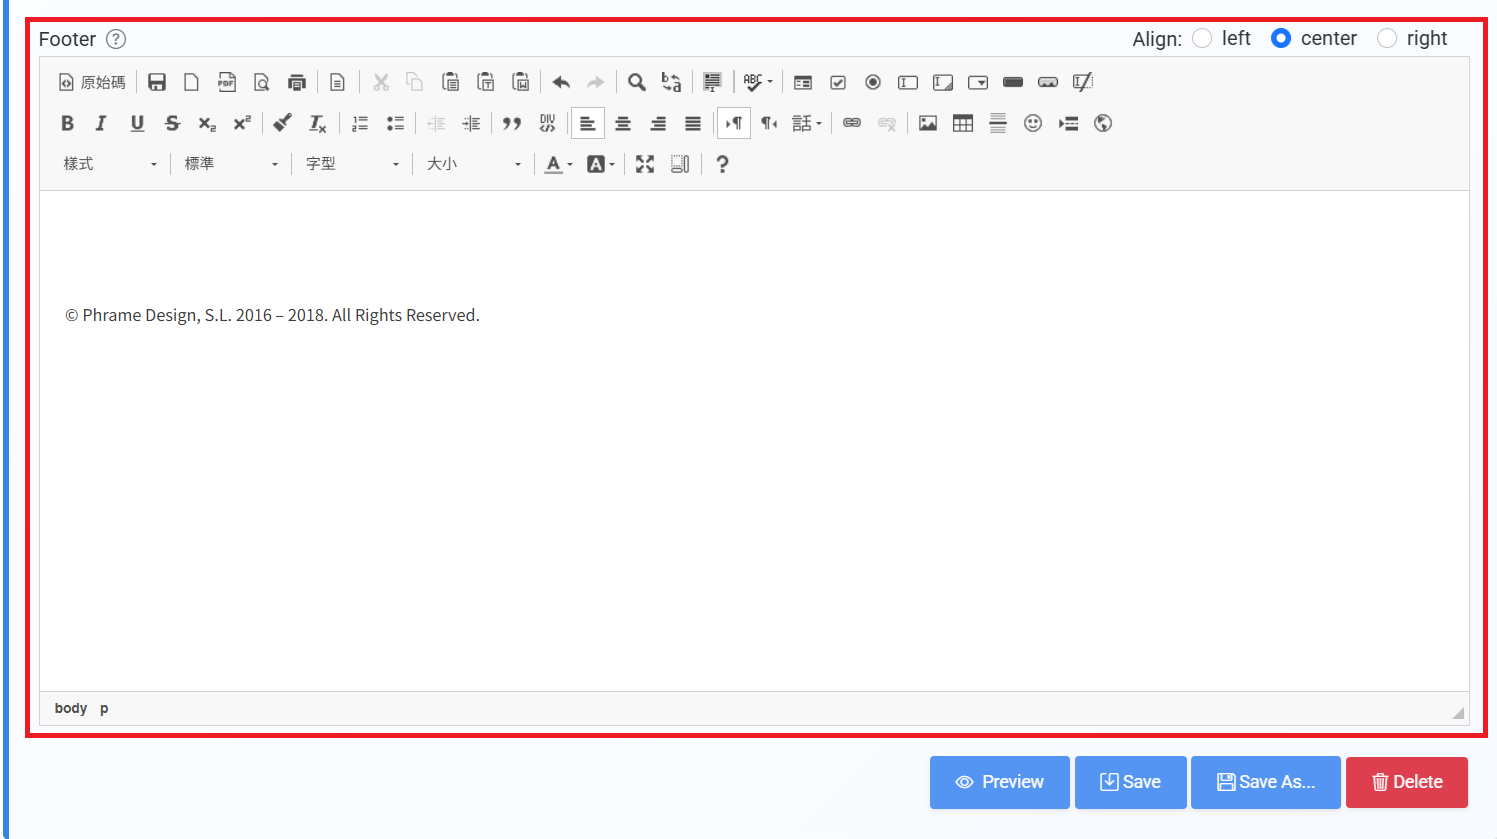
Enter the footer content and choose its alignment (left, center, or right)
After completing all configurations, click Save to finish creating your brand
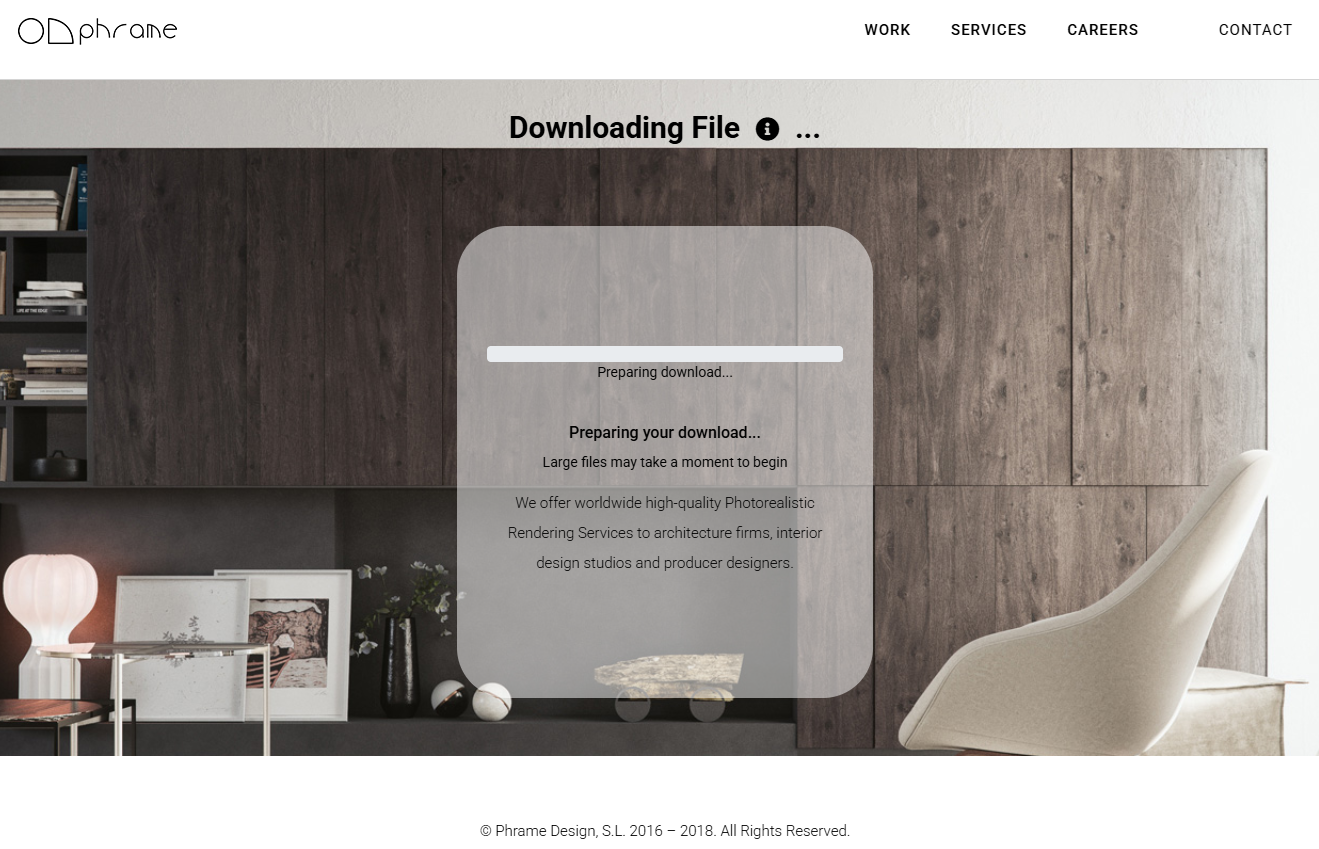
Final Result
Users will see a fully branded download page designed specifically for your brand, instead of the default system page.
Conclusion
The core value of the branding feature is transforming a “system page” into “your branded page”.
By following the steps above, you can quickly create a professional branded download experience.